

فايروول CSF Firewall تفعيل How to Enable CSF UI
How to enable full CSF UI (ConfigServer Security & Firewall Integrated User Interface)
How to Enable CSF Firewall Web UI
ConfigServer Security & Firewall (CSS) is an iptables based firewall for Linux systems. In our previous tutorial read installation tutorial of CSF on Linux system. CSF also provides in-built web UI for the managing firewall from the web interface. In this tutorial, you will find how to enable CSF Firewall Web UI on your system.
---------------------------------------------
Step 1 – Install Required Perl Modules:
---------------------------------------------
CSF UI required some of Perl modules to be installed on your system.
Use the following commands to install required modules as per your operating system.
Debian based systems:lكود:$ sudo apt-get install libio-socket-ssl-perl libcrypt-ssleay-perl \ libnet-libidn-perl libio-socket-inet6-perl libsocket6-per
Redhat based systems:
---------------------------------------------كود:$ sudo yum install perl-IO-Socket-SSL.noarch perl-Net-SSLeay perl-Net-LibIDN \ perl-IO-Socket-INET6 perl-Socket6
Step 2 – Enable CSF Firewall Web UI:
---------------------------------------------
To enable CSF web UI edit /etc/csf/csf.conf file in your favorite text editor and update the following values.
كود:$ sudo vim /etc/csf/csf.conf---------------------------------------------كود:# 1 to enable, 0 to disable web ui UI = "1" # Set port for web UI. The default port is 6666, but # I change this to 1025 to easy access. Default port create some issue # with popular chrome and firefox browser (in my case) UI_PORT = "1025" # Leave blank to bind to all IP addresses on the server UI_IP = "" # Set username for authetnication UI_USER = "admin" # Set a strong password for authetnication UI_PASS = "admin" After making changes, edit /etc/csf/ui/ui.allow configuration file and add your public IP to allow access to CSF UI. Change OUR_PUBLIC_IP_ADDRESS with your public IP address. $ sudo echo "YOUR_PUBLIC_IP_ADDRESS" >> /etc/csf/ui/ui.allow Web UI works under lfd daemon. So restart the lfd daemon on your system using the following command. $ sudo service lfd restart
Step 3 – Access and Use Web UI:
---------------------------------------------
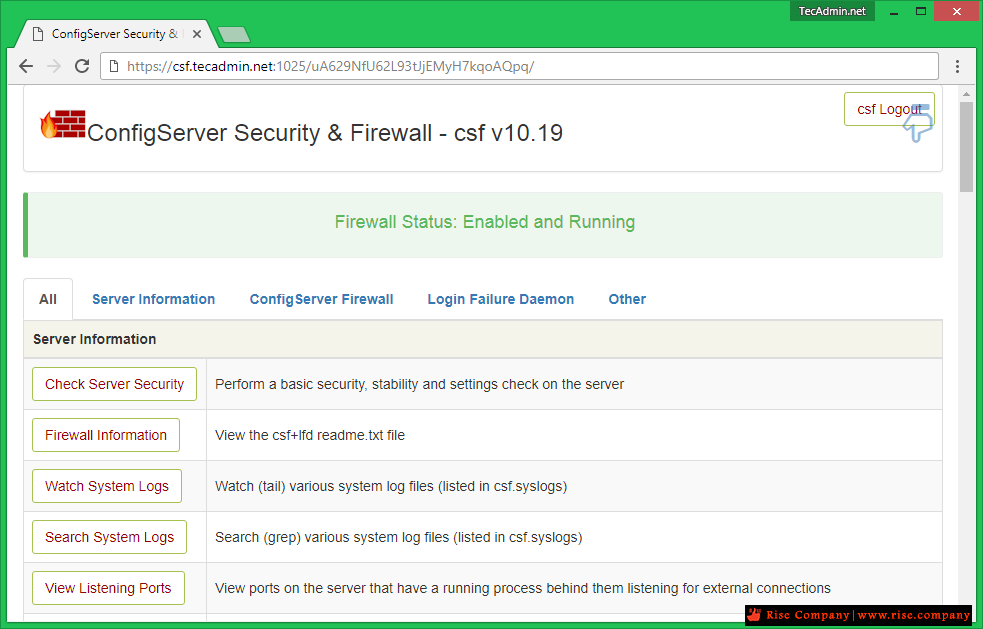
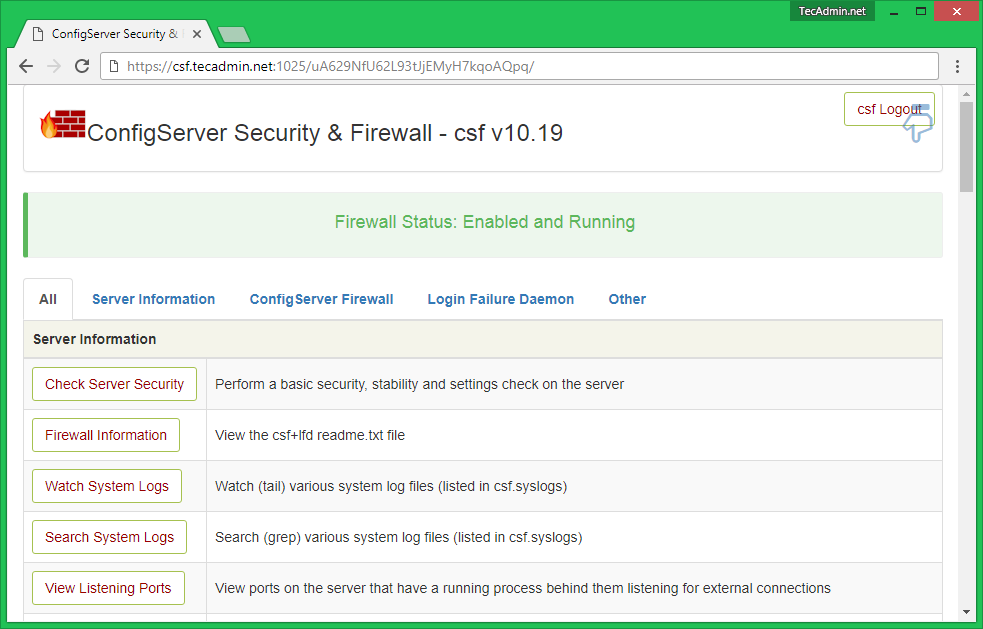
Now, access CSF UI on your browser with the specified port. For this tutorial, I have used 1025 port. This will prompt for user authentication first. After successful login, you will find the screen like below.
Allow IP Address – You can use below option to allow any IP quickly. This add the entry in /etc/csf/csf.allow file.
Deny IP Address – You can use below option to deny any IP quickly. This add the entry in /etc/csf/csf.deny file.
Unblock IP Address – You can use below option to quickly unblocked any IP which is already blocked by CSF.
المرجع:
https://tecadmin.net/how-to-enable-csf-firewall-web-ui/
https://wiki.centos-webpanel.com/how-to-enable-csf-ui
https://serverok.in/enable-ui-in-csf-firewall-on-centos
https://www.awsmonster.com/2019/01/c...on-centos.html
+ إنشاء موضوع جديد
النتائج 1 إلى 1 من 1
-
04-04-2020, 19:48 #1Status
- Offline

- تاريخ التسجيل
- Apr 2014
- الدولة
- Egypt
- المشاركات
- 4,703
 Engineering and Technology
- معدل تقييم المستوى
- 10
 فايروول CSF Firewall تفعيل How to Enable CSF UI
------------------------------------------------------------------------
فايروول CSF Firewall تفعيل How to Enable CSF UI
------------------------------------------------------------------------
شركة رايز للهندسة و التكنولوجيا Rise Company for Engineering & Technology
------------------------------------------------------------------------
Web Hosting | Web Designing | E-Marketing
رقم # 1 فى خدمات الشركات Business Services
استضافة مواقع Web Hosting - عمل ايميل شركة Business Emails
تصميم موقع شركة Web Design - تسويق الكترونى على جوجل Google Adwords
www.rise.company | www.rise.company/emails
ملحوظة : جميع خدماتنا مخصصة للشركات فقط وغير متاحة للافراد
وليس لنا اى منتجات او صيانة نهائيا! يرجى الانتباه الى ذلك.




 رد مع اقتباس
المواضيع المتشابهه
-
فايروول السي بانل Whm / Cpanel CSF Firewall تفعيل WARNING: RESTRICT_SYSLOG is disable
بواسطة Rise Company في المنتدى قسم فايروول CSFمشاركات: 0آخر مشاركة: 04-04-2020, 19:08 -
شرح تفعيل ملف لإعادة قراءة الروابط Enable easyapache 4 mod_rewrite
بواسطة Rise Company في المنتدى قسم ادارة الاستضافة Whmcsمشاركات: 0آخر مشاركة: 30-12-2019, 02:42 -
ووردبريس wordpress تفعيل تعدد المواقع Enable Multisite (WPMU)
بواسطة Rise Company في المنتدى قسم ووردبريس WordPressمشاركات: 0آخر مشاركة: 26-10-2019, 04:01 -
فايروول هاردوير Hardware Firewall || فايروول سوفتوير Software Firewall
بواسطة Rise Company في المنتدى رايز للسكيورتي Rise Securityمشاركات: 0آخر مشاركة: 15-09-2019, 23:11 -
حل مشكلة الشاشة البيضاء فى whmcs - و تفعيل دالة enable ini_set()
بواسطة Rise Company في المنتدى قسم ادارة الاستضافة Whmcsمشاركات: 0آخر مشاركة: 01-04-2017, 14:36

المفضلات