


nstallation and configuration mobile applications.
Application "GPS Tracker Mini" supports the following mobile applications with open source code:
Traccar
https://github.com/tananaev/traccar-client-android
https://github.com/tananaev/traccar-client-ios
Install:
Traccar Client for Android, Traccar Client for iOS, Traccar Client for Android (hidden version)
Copies:
Traccar Client for Android, Traccar Client for Android - hidden version, Traccar Client for Android - source code, Traccar Client for IOS - source code
GPS Logger
https://github.com/mendhak/gpslogger
http://code.mendhak.com/gpslogger/
Install:
GPS Logger for Android
Copies:
GPS Logger for Android, GPS Logger for Android - source code,
Traccar settings
- Install and start application.
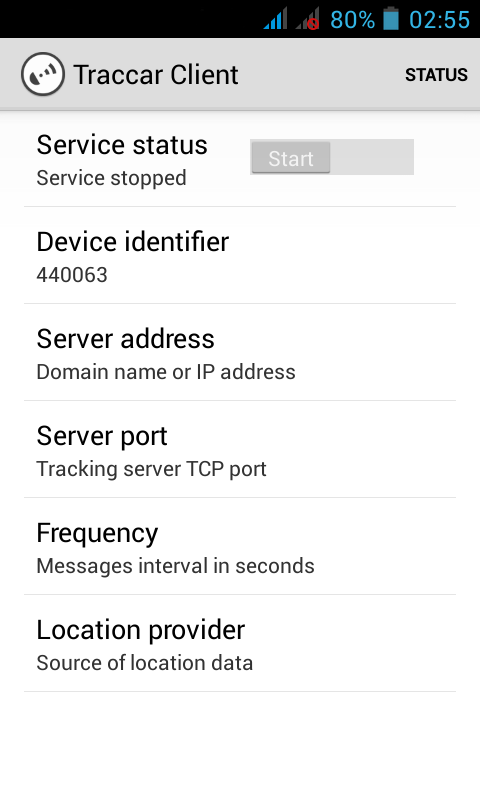
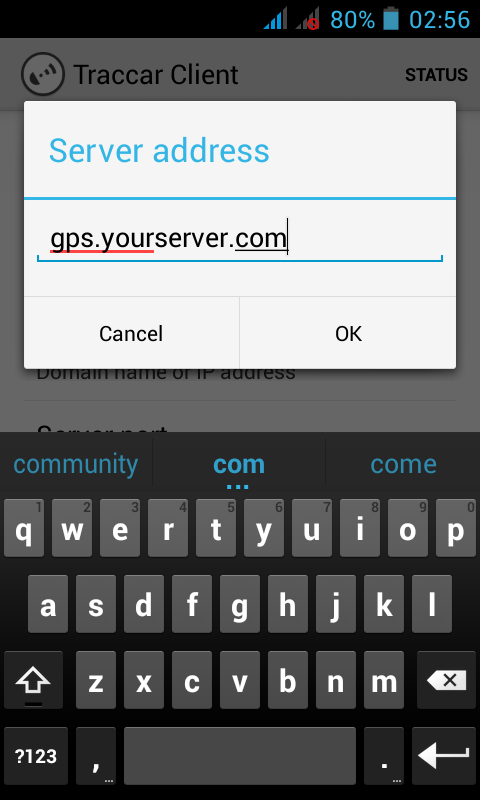
- Open "Server address" and enter the your server address.
- Open "Server port" and enter "80".

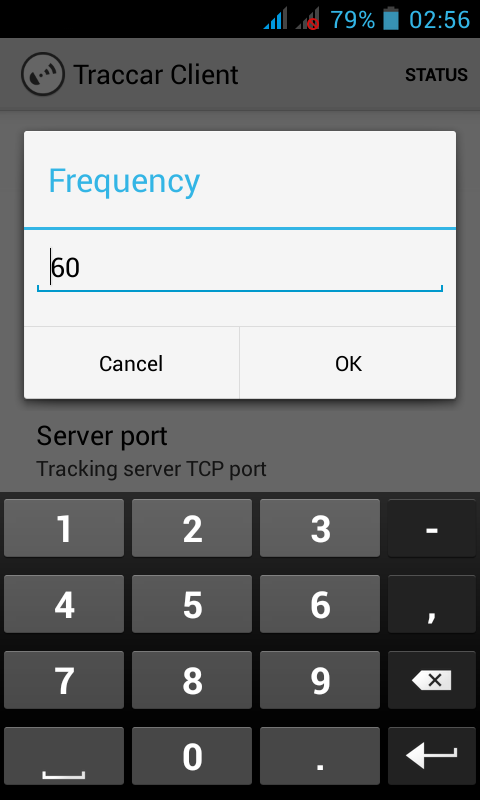
- Open "Frequency" and enter the frequency of sending geodata in seconds.
- You can set "Account identifier" - any number of objects for separation.
- Now press "Start" and go to section "Status". Here you can monitor the operation of the application.
Please read below about setting GPS.
GPSLogger settings
If you for some reason do not like the application "Traccar" you can use "GPSLogger".
- Install and start application.
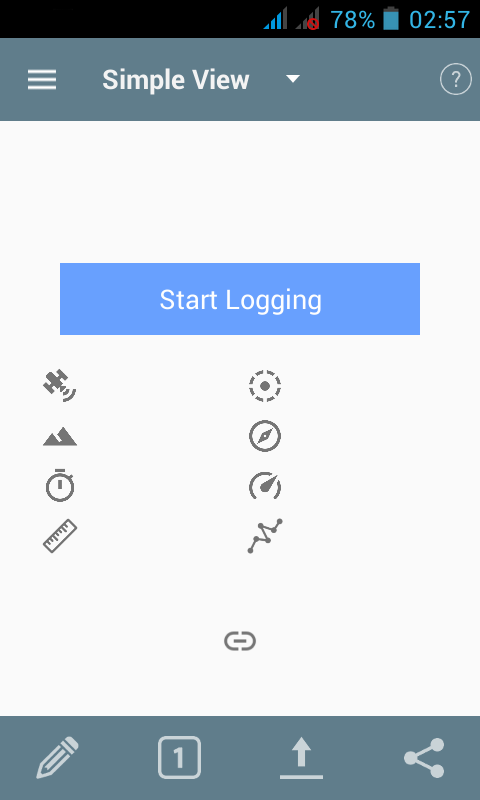
- Press on the menu and select "Logging details".
Turn on the "log to custom URL".
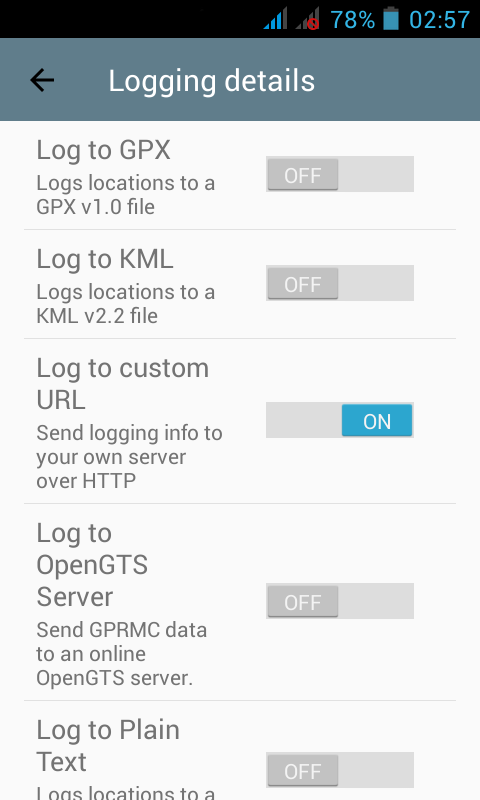
- Then enter the address of your server (look screenshot)
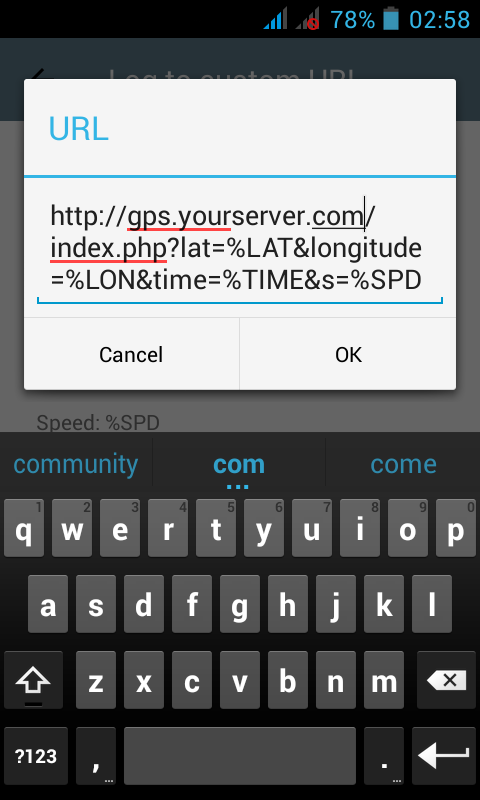
You can add parameter "&account_id=[ACCOUNT_NAME]" to record data to separate accounts. Replace "[ACCOUNT_NAME]" to your account name.
- Go to "Perfomance" and update "Time before logging".
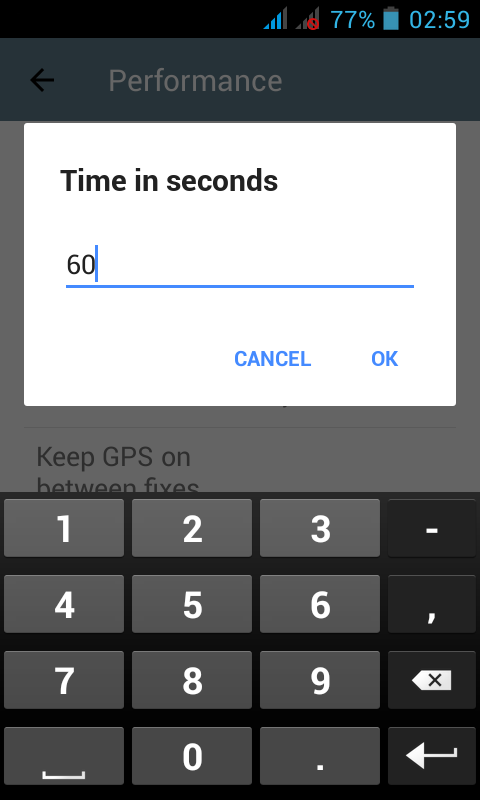
You can enter any time in seconds.- Now press "Start Logging".
Please read below about setting GPS.
GPS settings
For greater accuracy of GPS is recommended to switch off function "A-GPS".
On the your Android device go to "Settings" -> "Location access". Enable "Access to my location" and "GPS satellites".
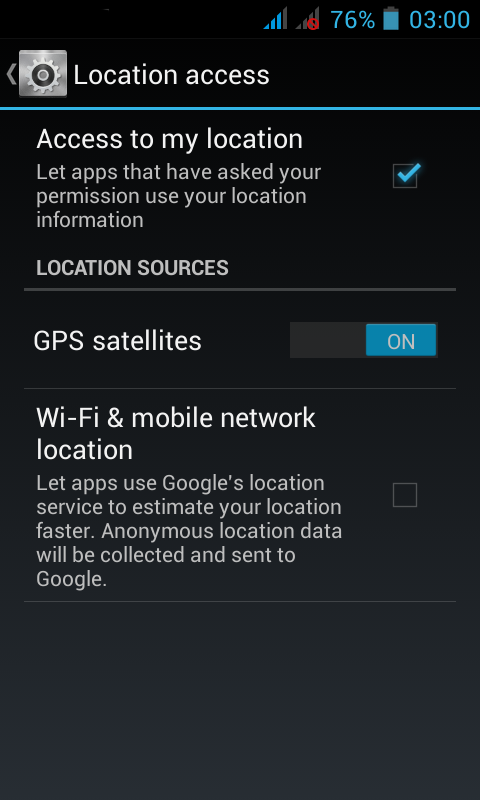
Press "GPS satelities" and switch off "A-GPS" and "GPS EPO".
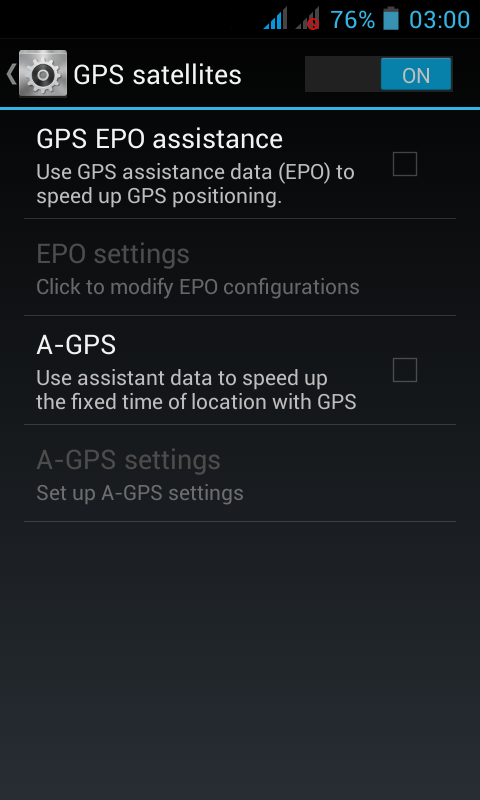
Now GPS may take longer time to run (about 5 minutes), but to determine the position of the place will be more accurate.
Servers managements - top
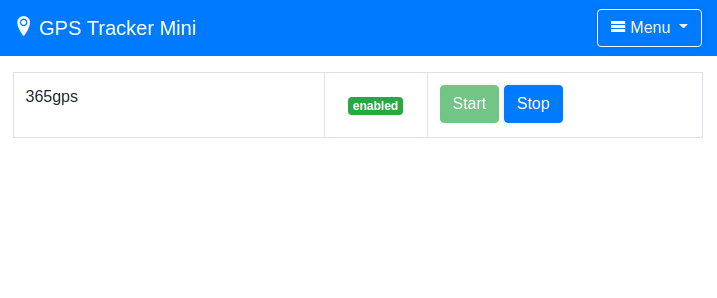
You can select "Server" in main menu. After that, you will be taken to the server management page.
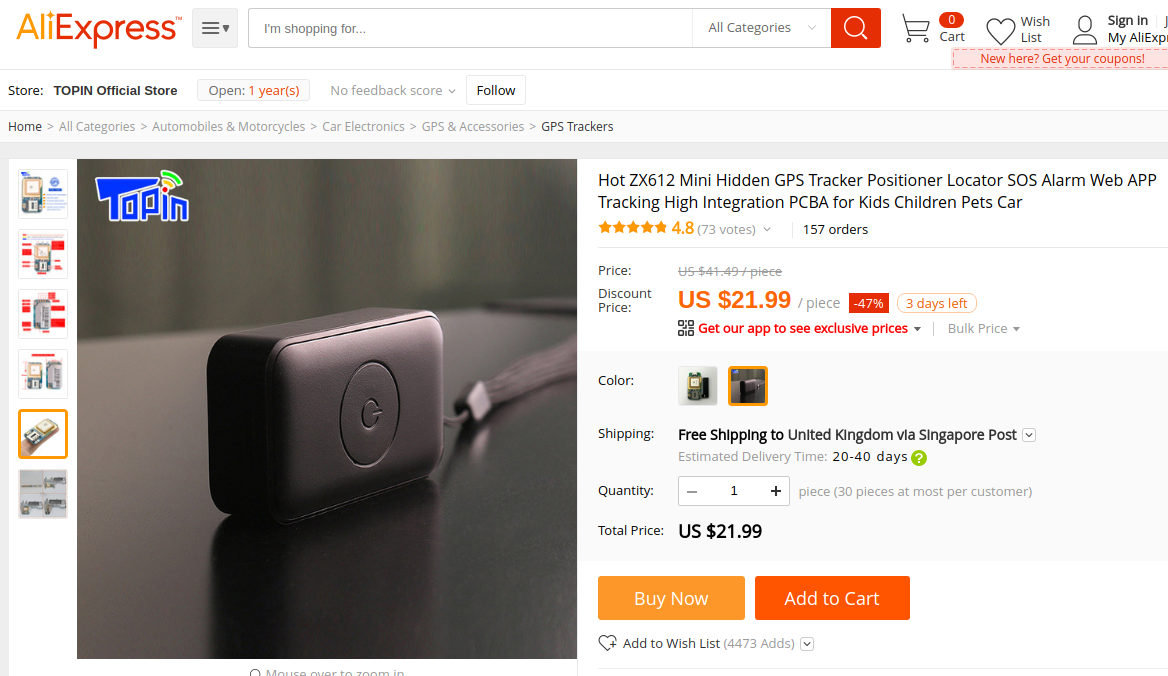
365gps - Server supported ZX612 GPS tracker (other is not tested). You can buy this device on AliExpress:
https://www.aliexpress.com/item/Topi...804101835.html
To configure the device, follow the instructions. You need to send SMS messages to change the server and port. You need to use the port 8002.
Example SMS message:
DOMAIN#gps.myserver.com#8002#
Change the frequency of sending data to the server (every 20 sec.):
MD#20
+ إنشاء موضوع جديد
النتائج 1 إلى 4 من 4
مشاهدة المواضيع
-
10-04-2020, 18:32 #2Status
- Offline

- تاريخ التسجيل
- Apr 2014
- الدولة
- Egypt
- المشاركات
- 4,698
 Engineering and Technology
- معدل تقييم المستوى
- 10
 رد: سكريبت PHP جي بي اس GPS Tracker لمراقبة الحركة من خلال الموقع
------------------------------------------------------------------------
رد: سكريبت PHP جي بي اس GPS Tracker لمراقبة الحركة من خلال الموقع
------------------------------------------------------------------------
شركة رايز للهندسة و التكنولوجيا Rise Company for Engineering & Technology
------------------------------------------------------------------------
Web Hosting | Web Designing | E-Marketing
رقم # 1 فى خدمات الشركات Business Services
استضافة مواقع Web Hosting - عمل ايميل شركة Business Emails
تصميم موقع شركة Web Design - تسويق الكترونى على جوجل Google Adwords
www.rise.company | www.rise.company/emails
ملحوظة : جميع خدماتنا مخصصة للشركات فقط وغير متاحة للافراد
وليس لنا اى منتجات او صيانة نهائيا! يرجى الانتباه الى ذلك.

 رد مع اقتباس
المواضيع المتشابهه
-
شروط سرعة الموقع و تحسين ترتيب الموقع
بواسطة Rise Company في المنتدى رايز للويب Rise Webمشاركات: 0آخر مشاركة: 06-05-2019, 04:08 -
أفضل جهاز تتبع مركبات
بواسطة كمال رامي في المنتدى رايز الإعلانات التجارية Rise Advertiseمشاركات: 35آخر مشاركة: 20-08-2018, 12:25 -
السيو Seo فى سكريبت Whmcs - أفضل اضافة مجانية لعمل سيو لصفحات الموقع
بواسطة Rise Company في المنتدى قسم ادارة الاستضافة Whmcsمشاركات: 0آخر مشاركة: 04-05-2018, 01:12 -
ازالة و حذف نشاط التيار (الحركة)
بواسطة Eng Amr Adel في المنتدى قسم منتدي vbمشاركات: 0آخر مشاركة: 29-07-2014, 00:03 -
برنامج لتتبع مكان اى ايميل فى العالم EMail Tracker Pro
بواسطة Eng Amr Adel في المنتدى رايز للكمبيوتر Rise Computerمشاركات: 0آخر مشاركة: 18-12-2009, 03:25

المفضلات