


The CalDAV and CardDAV Calendar and Contacts configuration can be achieved using 3rd-party applications, such asOne Calendar,CardDAV sync free, orDAVx5.
Below are the guidelines covering the CalDAV account setup in the application called OneCalendar, which is very easy to use.
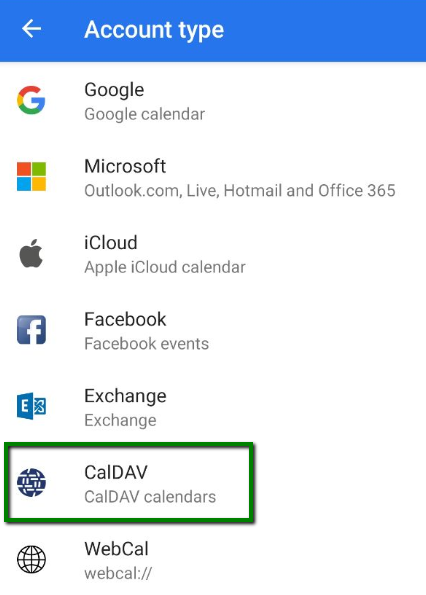
1. Once launched, choose the preferred theme. After this you will be able to choose theAccount type. Click on theCalDavoption:
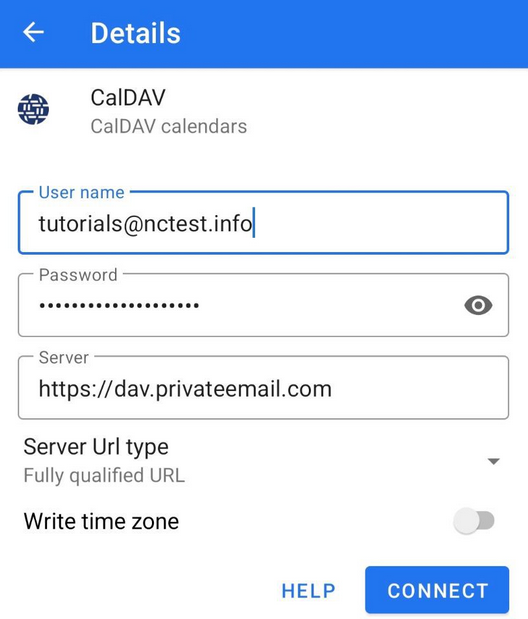
2. In the next window, choose fill in the information as follows:
https://dav.privateemail.com
- full Namecheap Private Email email address
- the password for this email address
Then clickConnectto start synchronization:
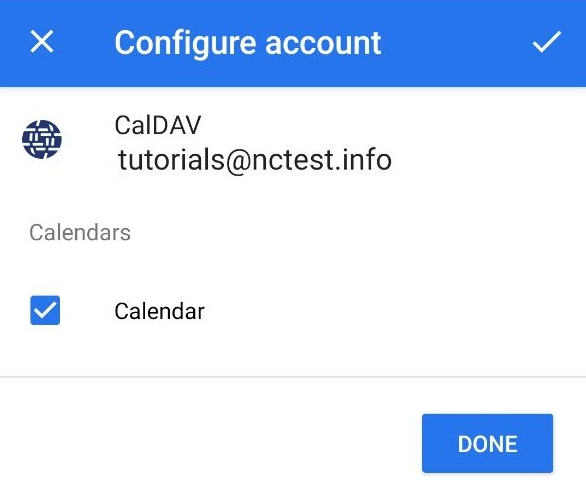
3. Tap on theCalendarcheckbox > clickDoneto finish the configuration of your CalDAV account:
If everything is configured properly, the synchronization will start automatically.
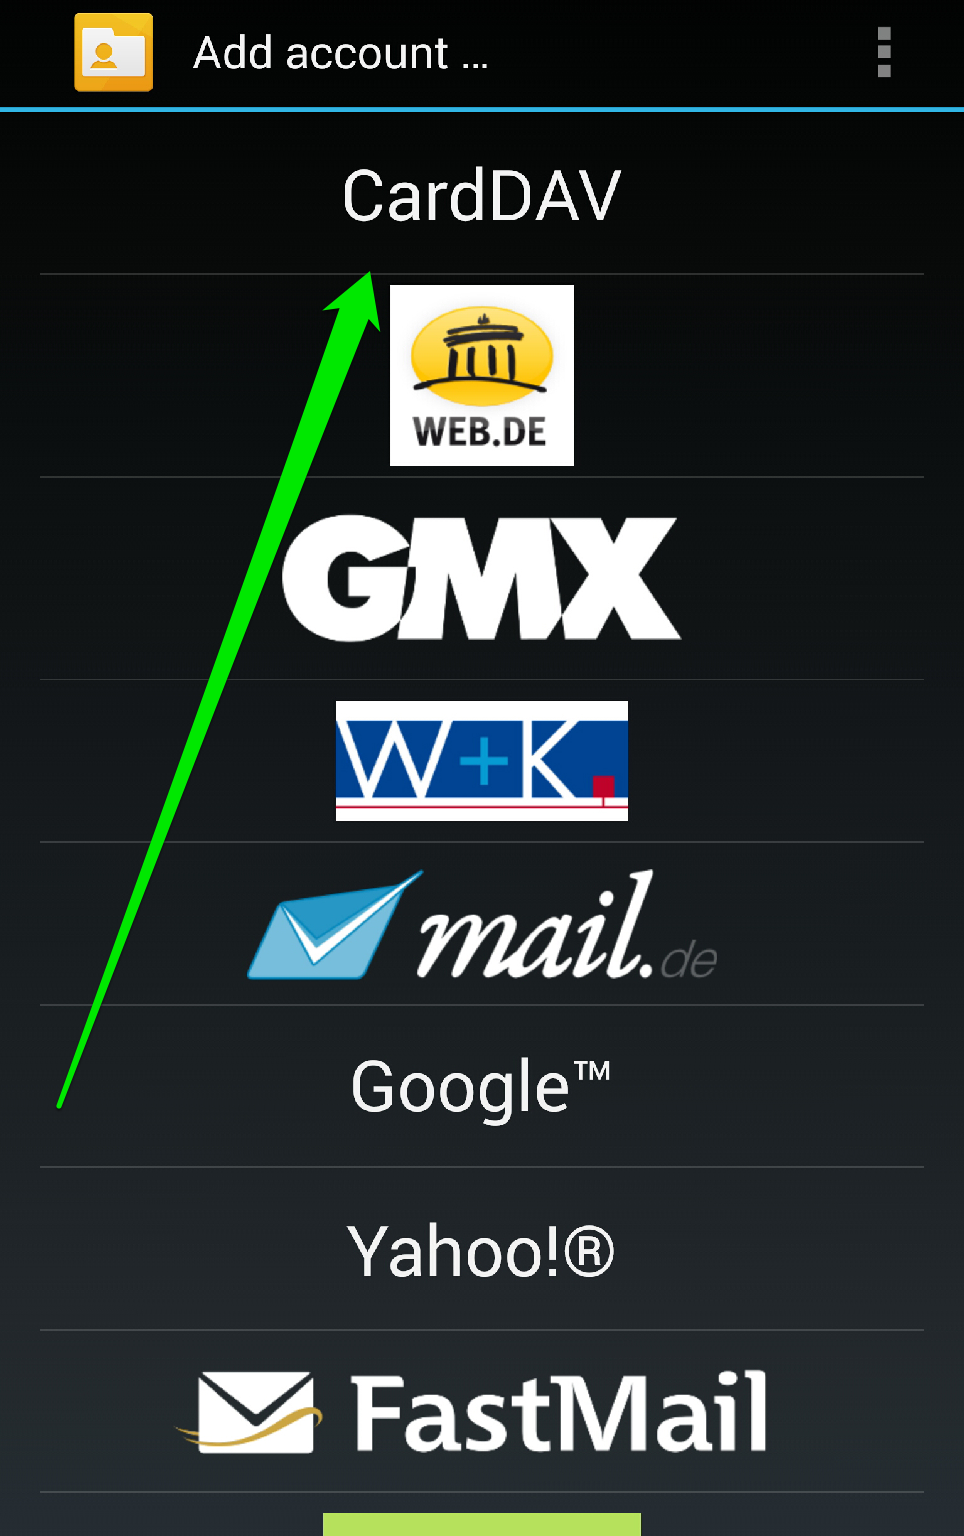
Here we use the application calledCardDAV Syncwhich allows to set up contacts synchronization easily as well.
1. Launch the application and tapCardDAVoption:
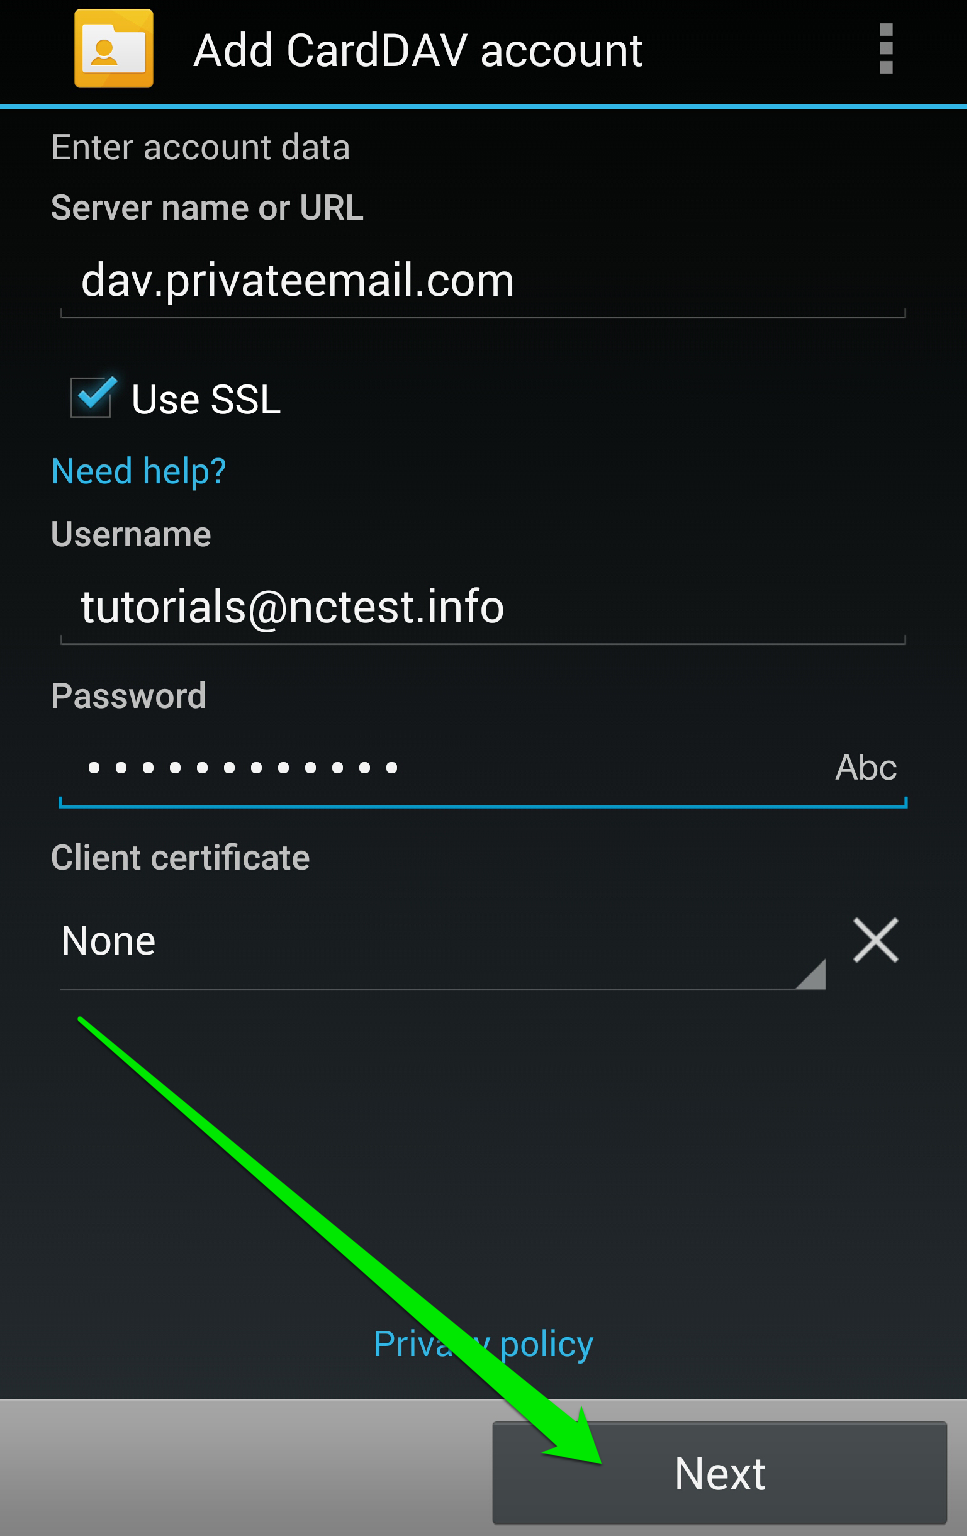
2. In the next window you will need to indicate the server information:
Server Name or URL: dav.privateemail.com
Use SSL: should be checked
Username: full Namecheap Private Email email address
Password: the password for this email address
Once all the settings are configured, click onNextbutton:
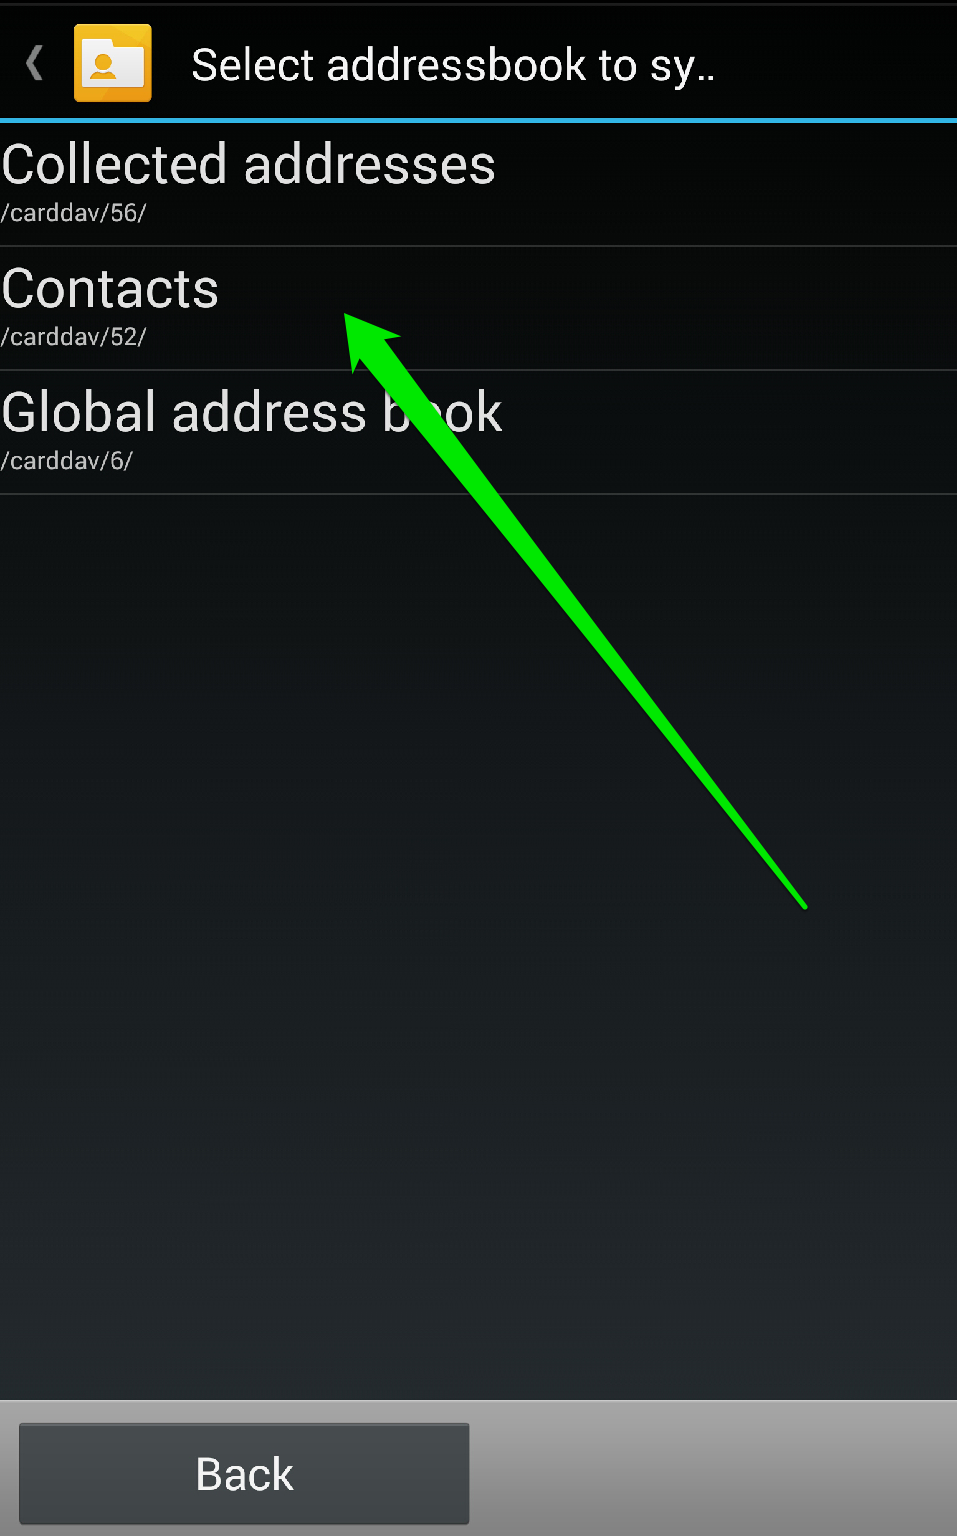
3. ChooseContactsoption to synchronize all your Namecheap Private Email contacts.
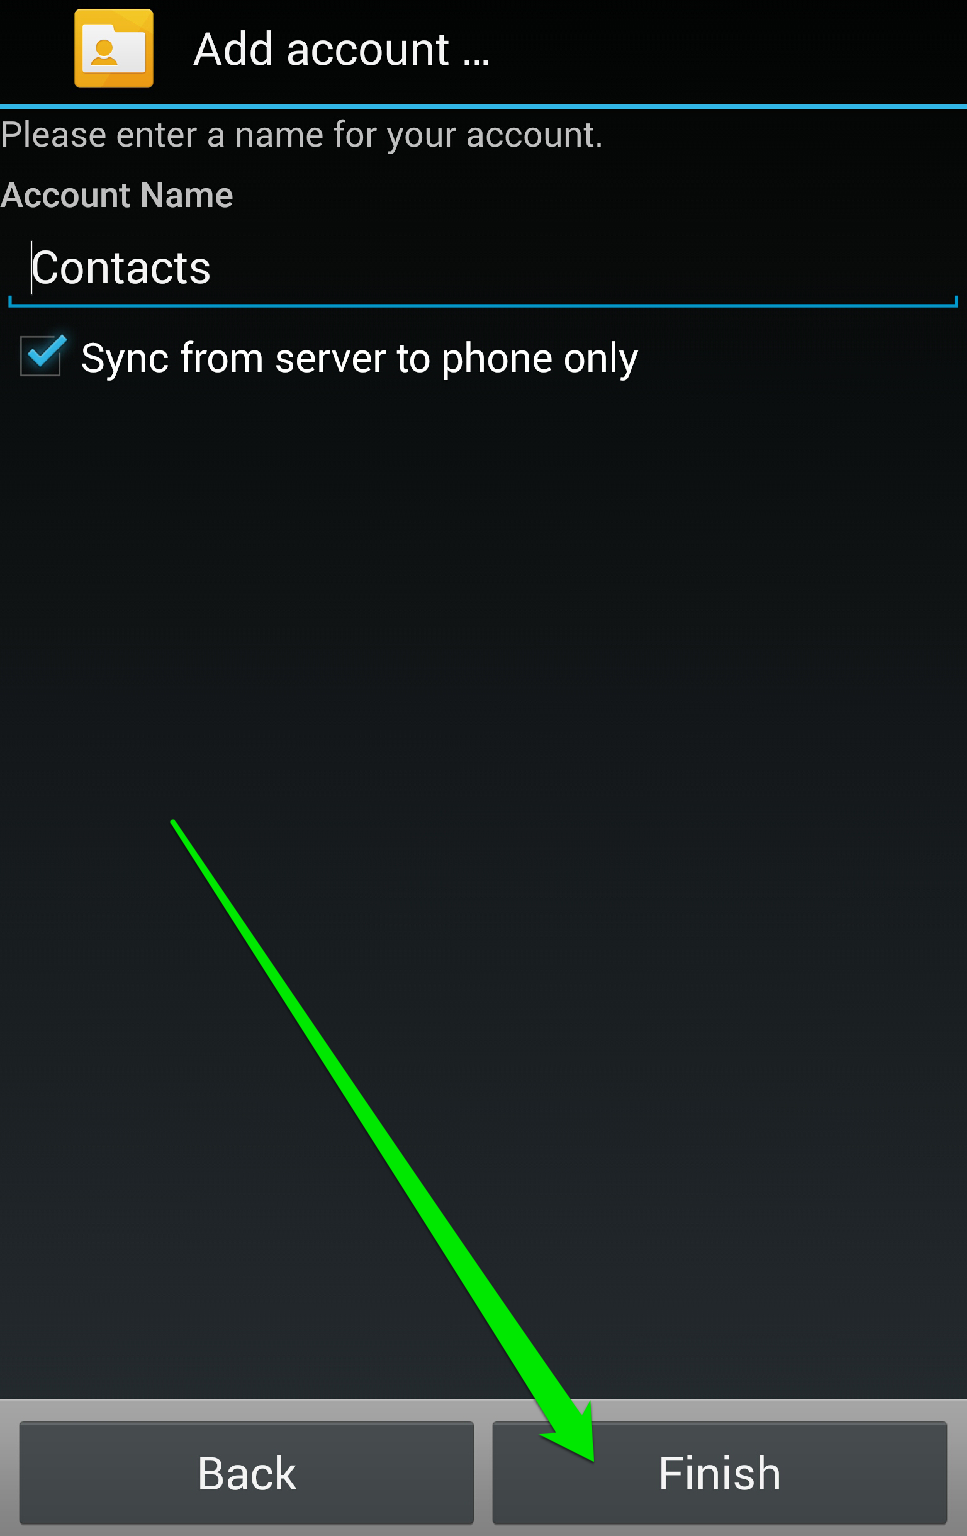
Once done, simply tapFinishto complete the configuration of your CardDAV account:
+ إنشاء موضوع جديد
النتائج 1 إلى 3 من 3
العرض المتطور
-
16-02-2023, 16:37 #1Status
- Offline

- تاريخ التسجيل
- Apr 2014
- الدولة
- Egypt
- المشاركات
- 4,701
 Engineering and Technology
- معدل تقييم المستوى
- 10
 رد: الاندرويد Android / الاي فون iPhone مزامنة Caldav/Carddav - Calendar & Contacts
------------------------------------------------------------------------
رد: الاندرويد Android / الاي فون iPhone مزامنة Caldav/Carddav - Calendar & Contacts
------------------------------------------------------------------------
شركة رايز للهندسة و التكنولوجيا Rise Company for Engineering & Technology
------------------------------------------------------------------------
Web Hosting | Web Designing | E-Marketing
رقم # 1 فى خدمات الشركات Business Services
استضافة مواقع Web Hosting - عمل ايميل شركة Business Emails
تصميم موقع شركة Web Design - تسويق الكترونى على جوجل Google Adwords
www.rise.company | www.rise.company/emails
ملحوظة : جميع خدماتنا مخصصة للشركات فقط وغير متاحة للافراد
وليس لنا اى منتجات او صيانة نهائيا! يرجى الانتباه الى ذلك.

 رد مع اقتباس
المواضيع المتشابهه
-
أفضل تطبيقات Apps خاصة بالقران الكريم Quran على الاندرويد Android
بواسطة Rise Company في المنتدى رايز الإعلانات التجارية Rise Advertiseمشاركات: 0آخر مشاركة: 30-11-2019, 03:10 -
أندرويد Android مزامنة الصور لجهات الاتصال sync contacts photos جديد 2019
بواسطة Rise Company في المنتدى رايز للجوالات Rise Phonesمشاركات: 0آخر مشاركة: 09-09-2019, 02:13 -
تحويل الارقام من الاي فون الى الاندرويد convert iphone to android Gmail csv
بواسطة Rise Company في المنتدى رايز للجوالات Rise Phonesمشاركات: 0آخر مشاركة: 05-09-2019, 15:34 -
مقوي الشبكة Signal Booster قياس اشارة الارسال فى الاي فون iPhone dBm
بواسطة Rise Company في المنتدى قسم مقوي الشبكةمشاركات: 0آخر مشاركة: 03-09-2019, 23:11 -
خاصية نطق اسم المتصل فى الاى فون iphone announce calls
بواسطة Rise Company في المنتدى رايز للجوالات Rise Phonesمشاركات: 0آخر مشاركة: 08-04-2018, 17:01

المفضلات