


How to Use Print Server Function on TP-LINK Wireless Router?
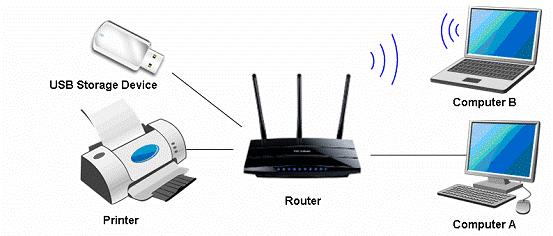
Definition: Print server is a function embedded in your Router. It allows you to share your printer with computers that are connected to the Router.
Preparation:
TP-LINK Router with USB port which supports print server functionComputer with Windows XP/ Windows Vista/ Windows 7/ MacUSB printer and USB cable
Note:
Make sure you have already installed the printer’s driver on your computer. Otherwise, please install it first.Any computer in your LAN must first install the software if it wants to share the print server via the Router.
Installation - For Windows 7, Vista & XP (For Mac OS)
Step 1
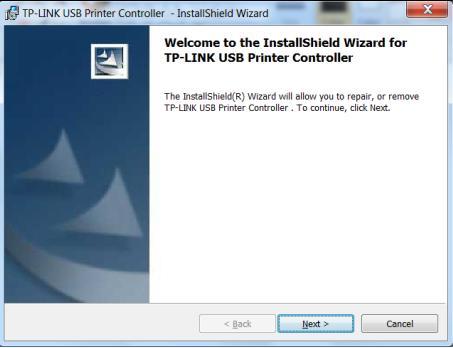
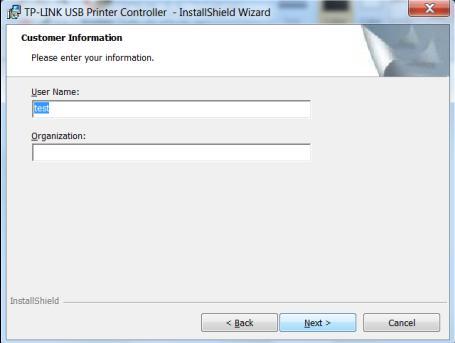
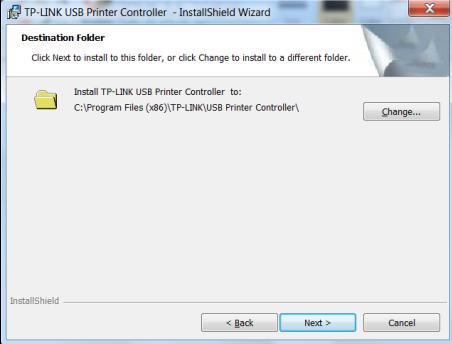
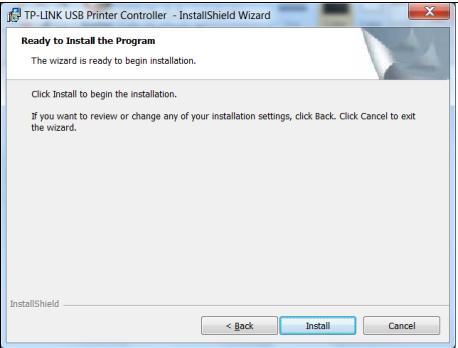
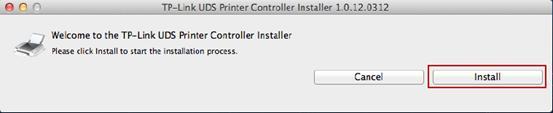
Download the setup software TP-Link USB Printer Controller utility from our website: www.tp-link.com.Step 2Double-click TP-LINK USB Printer Controller Setup.exeyou’ve downloaded.Step3Click NEXT to start installing the printer share software.Step 4Please enter your information in the requested field and then click Next.Step 5Click Change… to select another destination folder, or leave it default and click Next.Step 6Click Install to begin the installation.Step 7Please wait a while, Click Finish to complete and exit the Install Shield Wizard.Installation - for Mac OSStep 1Download the setup software TP-Link UDS Printer Controller Installer.dmg from our website: www.tp-link.com.Step 2Double-click the software you’ve downloaded.Step 3Double-click the TP-Link UDS Printer Controller Installer.app in the windowthat pops upStep 4Click Install to start the installation process.Step 5Click Restart to finish the software installation.
Application - For Windows 7, Vista & XP (For MAC OS)
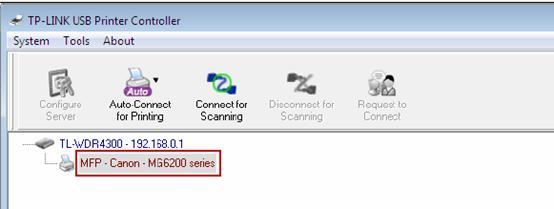
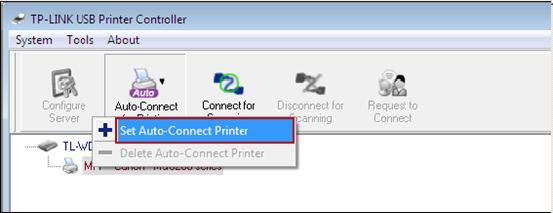
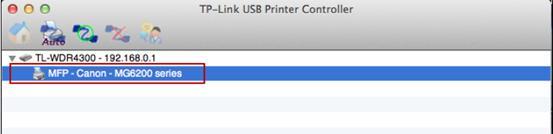
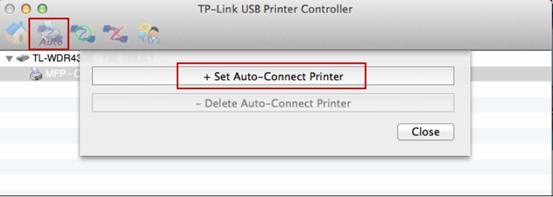
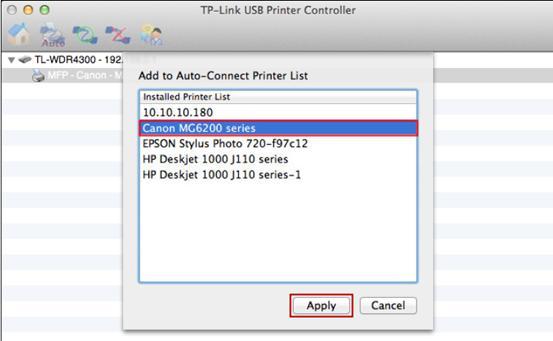
After successful installation, the icon will appear on the desktop of your computer.Step 1Double-click the icon To Launch the TP-LINK USB Printer ControllerStep 2Highlight the printer you want to set as auto-connect printer.Step 3Click the inverse triangle mark on the Auto-Connect for printing tab to pull down the list, where you can select Set Auto-Connect Printer.Step 4Tick the name of the printer you would like to set as auto-connect printer, and then click Apply.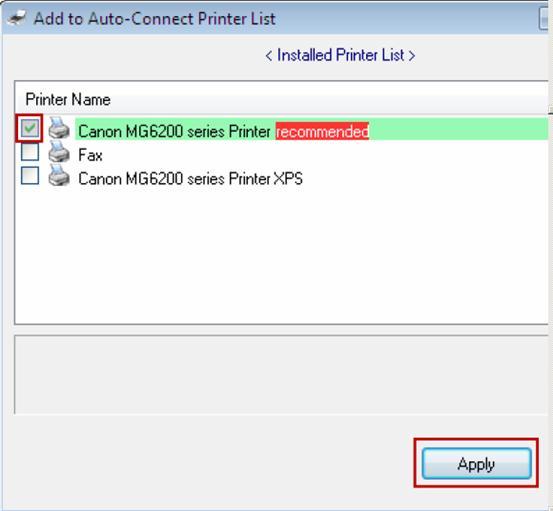 Application - for Mac OSStep 1Double-click the icon to launch the USB Printer ControllerStep 2Highlight your printer.Step 3Click the tab Auto-Connect for printing to pull down a list, whereyou can select Set Auto-Connect Printer.Step 4Select the printer you would like to set as auto-connect printer, and then click the Apply button.After successful setting, you will see the printer marked as Auto-Connect Printer. You can execute your printing tasks automatically.
+ إنشاء موضوع جديد
النتائج 1 إلى 2 من 2
مشاهدة المواضيع
-
01-12-2015, 08:05 #1Status
- Offline

- تاريخ التسجيل
- Apr 2014
- الدولة
- Egypt
- المشاركات
- 4,628
 Engineering and Technology
- معدل تقييم المستوى
- 10
 شرح توصيل برنتر usb براوتر How to Use Print Server Function on TP-LINK
------------------------------------------------------------------------
شرح توصيل برنتر usb براوتر How to Use Print Server Function on TP-LINK
------------------------------------------------------------------------
شركة رايز للهندسة و التكنولوجيا Rise Company for Engineering & Technology
------------------------------------------------------------------------
Web Hosting | Web Designing | E-Marketing
رقم # 1 فى خدمات الشركات Business Services
استضافة مواقع Web Hosting - عمل ايميل شركة Business Emails
تصميم موقع شركة Web Design - تسويق الكترونى على جوجل Google Adwords
www.rise.company | www.rise.company/emails
ملحوظة : جميع خدماتنا مخصصة للشركات فقط وغير متاحة للافراد
وليس لنا اى منتجات او صيانة نهائيا! يرجى الانتباه الى ذلك.


 رد مع اقتباس
المواضيع المتشابهه
-
حل مشكلتين فى الراوتر سببهم تحديد الدولة tp link Wireless 5GHz disabled- Region
بواسطة Eng Amr Adel في المنتدى قسم الشبكاتمشاركات: 0آخر مشاركة: 19-09-2015, 04:34 -
Disable PHP mail function on cPanel server
بواسطة Rise Company في المنتدى قسم الايميلات Emailsمشاركات: 4آخر مشاركة: 06-11-2014, 02:33 -
شرح تنزيل php Live Installation
بواسطة Eng Amr Adel في المنتدى رايز للاستضافة Rise Hostمشاركات: 0آخر مشاركة: 22-10-2012, 14:17 -
Premium Link Generator RS,MU,ES,GS للتحميل المباشر من الرابيدشير وهوت فايل ميغا ابلود
بواسطة Eng Amr Adel في المنتدى رايز للكمبيوتر Rise Computerمشاركات: 0آخر مشاركة: 23-12-2009, 16:25 -
Call of duty Modern warfare 2 full and rip FTP link
بواسطة Eng Amr Adel في المنتدى قسم جيمرز Gamersمشاركات: 0آخر مشاركة: 16-12-2009, 22:59

المفضلات