

ماي كلاود My Cloud برنامج الباك اب التلقائى Automatic Backup
WD SmartWare - Software that facilitates automatic and continuous backup of all your files
Installing WD SmartWare and creating an initial backup on a Windows computer
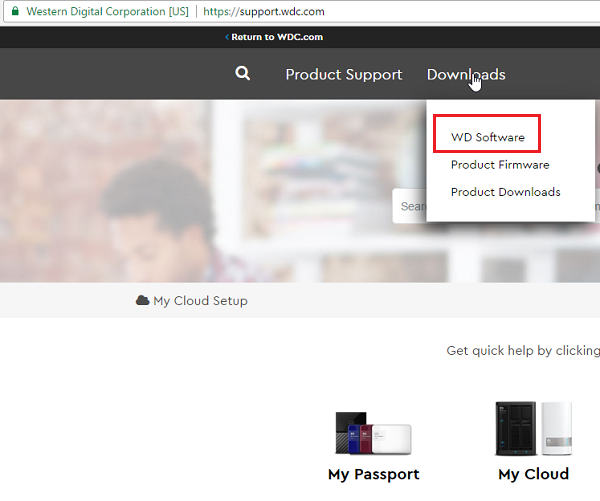
- Go to https://support.wdc.com and click on Downloads and go to WD Software.
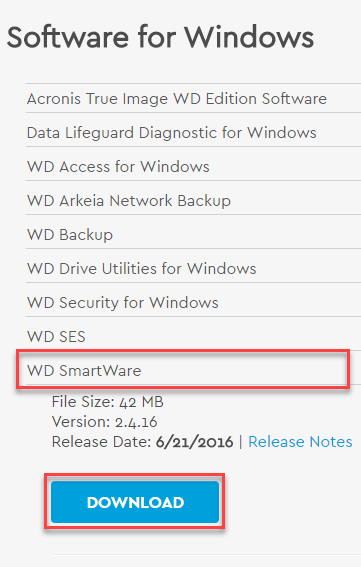
- Go to Software for Windows and Download WD SmartWare.
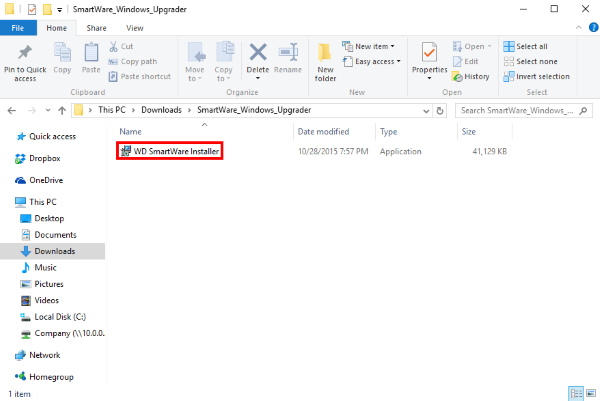
- Save the download file on a location that is easy to access, such as the Desktop or the Downloads folder.
- Once the download finishes, open the .zip file and extract the software installer. Once done, run the application installer to start the installation wizard.
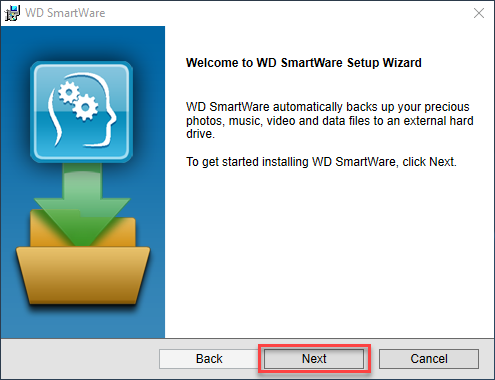
- After the Welcome to WD SmartWare Setup Wizard will appear, click Next.
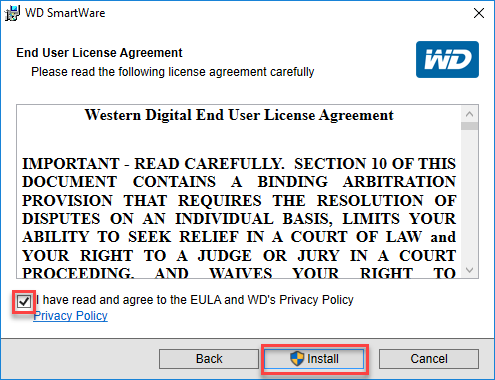
- Read the Western Digital End User License Agreement, and once ready, check the I have read and agree to the EULA and WD's Privacy Policy the License Agreement check-box, and click Install.
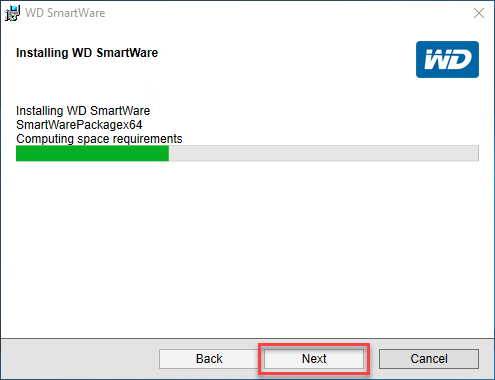
- The WD SmartWare software will install on the system. This may take a few minutes.
- Click Finish once the setup has completed to exit the installer.
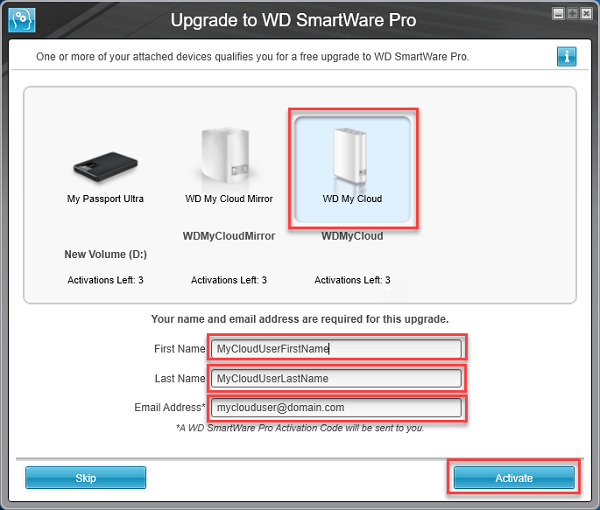
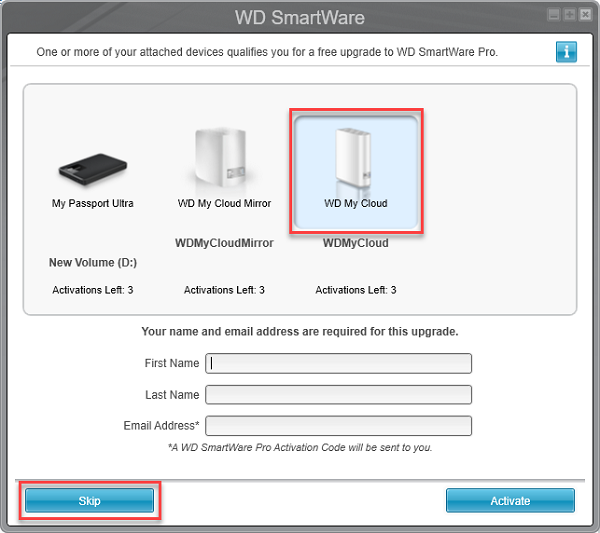
- If the product qualifies for a free upgrade to WD SmartWare Pro, fill out your name and email address and click Activate.
- Click Skip if you want to activate the WD SmartWare Pro later.
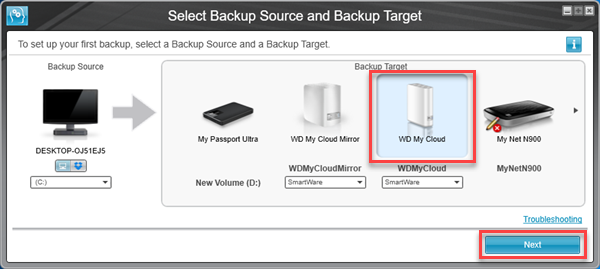
- To setup your first backup, select a Backup Source and a Backup Target and click Next.
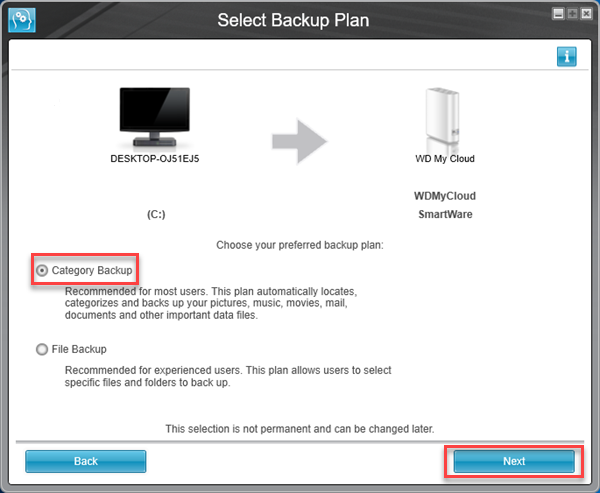
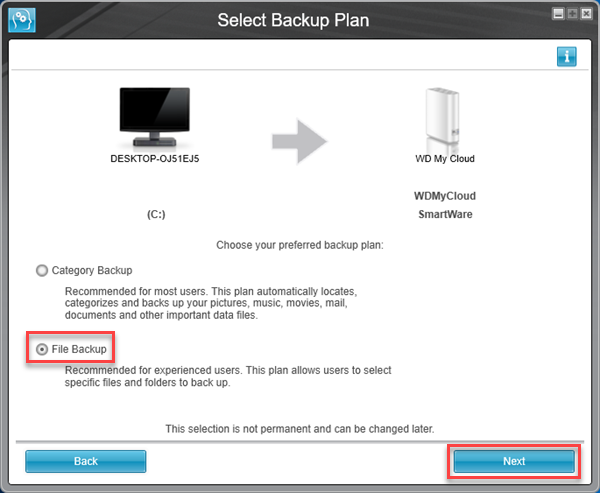
- Choose your preferred backup plan: Category or File Backup and click Next.
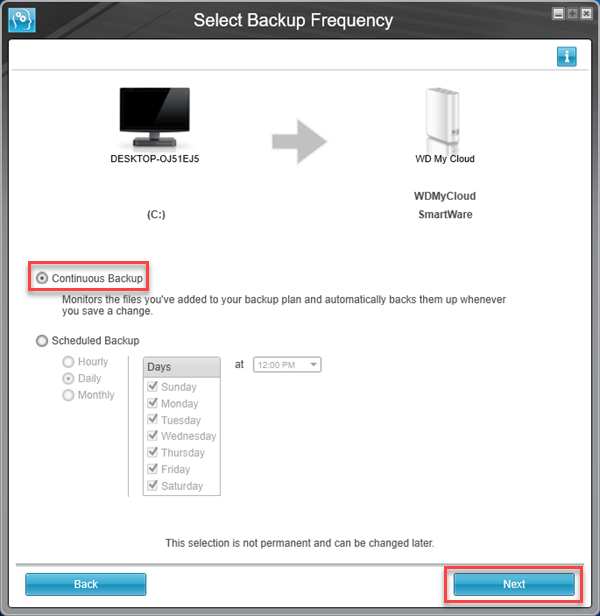
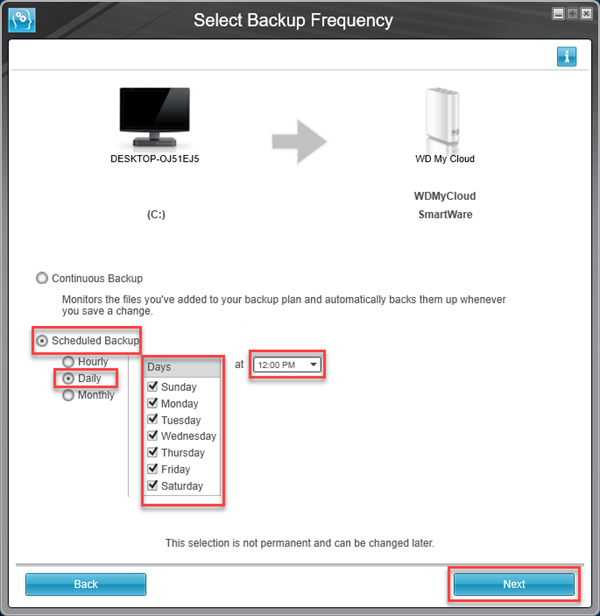
- Select the backup frequency: Continuous or Scheduled Backup and click Next.
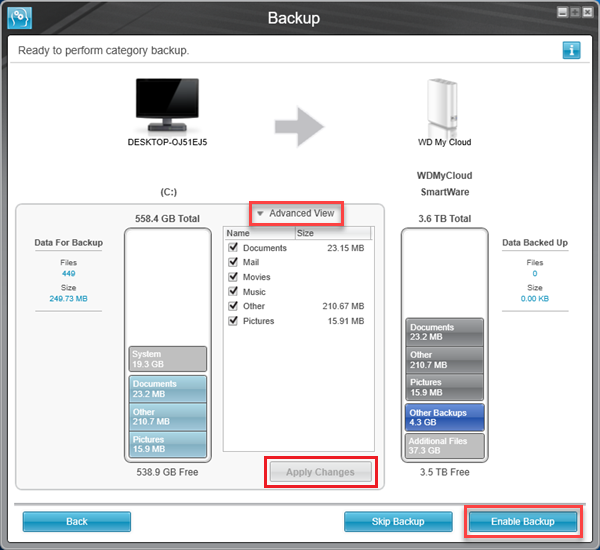
- For Category Backup, click on Advanced View to select the categories for backup, click on Apply Changes, and click on Enable Backup.
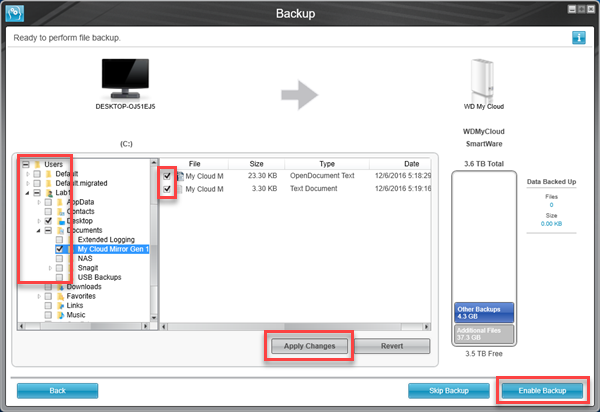
- For File Backup, select the folders or files for backup, click on Apply Changes, and click on Enable Backup.
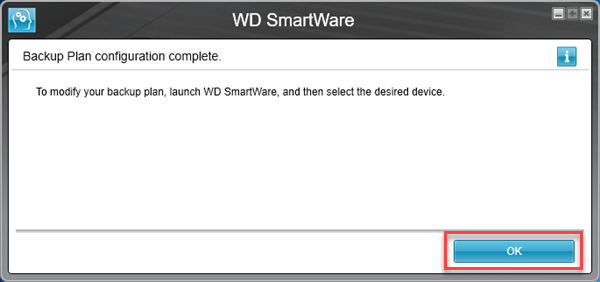
- Click OK to confirm the backup plan configuration has completed.
التحميل
اخر اصدار من البرنامج 05/25/2018
من هنا
المرجع:
https://support-en.wd.com/app/produc...6#WD_downloads
+ إنشاء موضوع جديد
النتائج 1 إلى 1 من 1
-
30-07-2019, 06:26 #1Status
- Offline

- تاريخ التسجيل
- Apr 2014
- الدولة
- Egypt
- المشاركات
- 4,617
 Engineering and Technology
- معدل تقييم المستوى
- 10
 ماي كلاود My Cloud برنامج الباك اب التلقائى Automatic Backup
------------------------------------------------------------------------
ماي كلاود My Cloud برنامج الباك اب التلقائى Automatic Backup
------------------------------------------------------------------------
شركة رايز للهندسة و التكنولوجيا Rise Company for Engineering & Technology
------------------------------------------------------------------------
Web Hosting | Web Designing | E-Marketing
رقم # 1 فى خدمات الشركات Business Services
استضافة مواقع Web Hosting - عمل ايميل شركة Business Emails
تصميم موقع شركة Web Design - تسويق الكترونى على جوجل Google Adwords
www.rise.company | www.rise.company/emails
ملحوظة : جميع خدماتنا مخصصة للشركات فقط وغير متاحة للافراد
وليس لنا اى منتجات او صيانة نهائيا! يرجى الانتباه الى ذلك.


 رد مع اقتباس
المواضيع المتشابهه
-
تجميع كل شىء عن الماى كلاود my cloud و my cloud home
بواسطة Rise Company في المنتدى قسم التخزين الشبكي NASمشاركات: 0آخر مشاركة: 21-02-2019, 20:52 -
شرح اخذ باك اب Backup لتطبيقات الايفون Iphone من خلال برنامج اى كلاود iCloud
بواسطة Rise Company في المنتدى رايز للجوالات Rise Phonesمشاركات: 0آخر مشاركة: 08-04-2018, 04:25 -
ماي كلاود My Cloud التوصيل مع الكمبيوتر من خلال usb
بواسطة Rise Company في المنتدى قسم التخزين الشبكي NASمشاركات: 0آخر مشاركة: 06-06-2017, 09:35 -
ماي كلاود My Cloud اخذ نسخة احتياطية تلقائية automatic backup
بواسطة Rise Company في المنتدى قسم التخزين الشبكي NASمشاركات: 0آخر مشاركة: 22-12-2016, 17:07 -
برنامج كل يوم النسخ الاحتياطي التلقائي Everyday Auto Backup
بواسطة Rise Company في المنتدى رايز للكمبيوتر Rise Computerمشاركات: 0آخر مشاركة: 22-12-2016, 15:42

المفضلات