

فايروول فورتي جيت FortiGate Firewall في بي ان IPsec VPN with FortiClient
شرح تفصيلى / خطوات / اعدادات الفي بي ان OS: FortiOSVersion: 6.0+
Configure Remote Access IPSec VPN in FortiGate Firewall
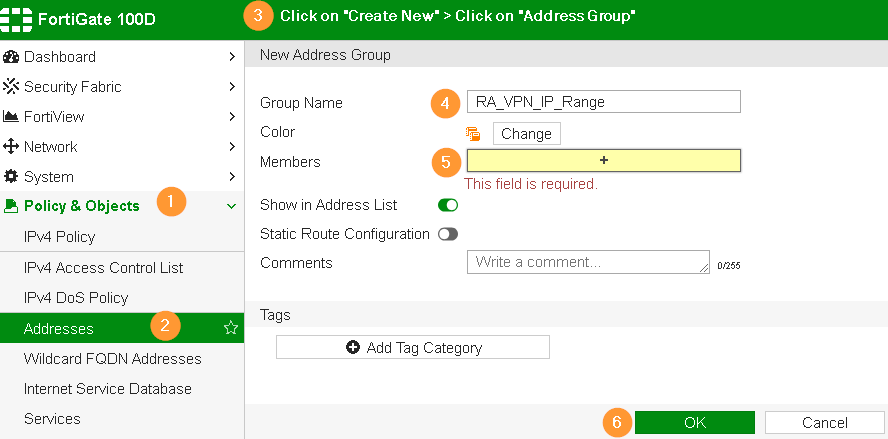
Step 1 – Create Address Group for Forticlient
Policy & Objects > Addresses > click Create New > click Address Group
You must choose the IP range that is never used in your network. While connecting to FortiGate firewall, Forticlients will receive IP address from this
range. For example, 192.168.180.0/24
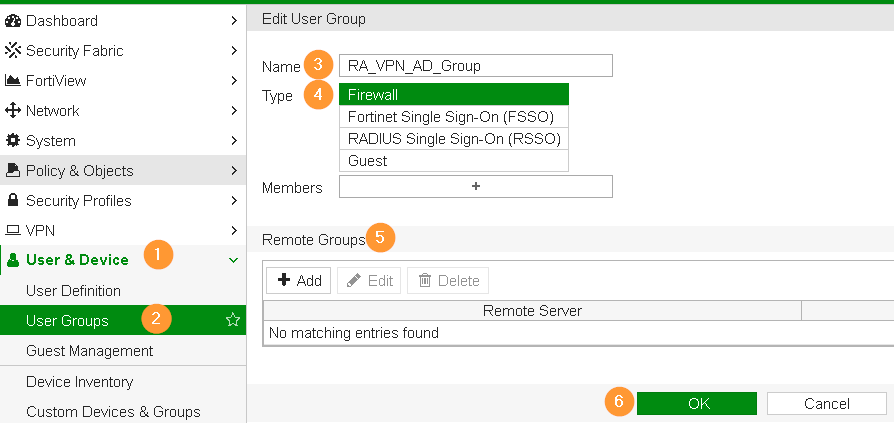
Step 2 – Create User and User Group
Our recommendation is to configure Active Directory User Group instead of creating local user account on firewall appliance. AD provides lots of convenience in user management.
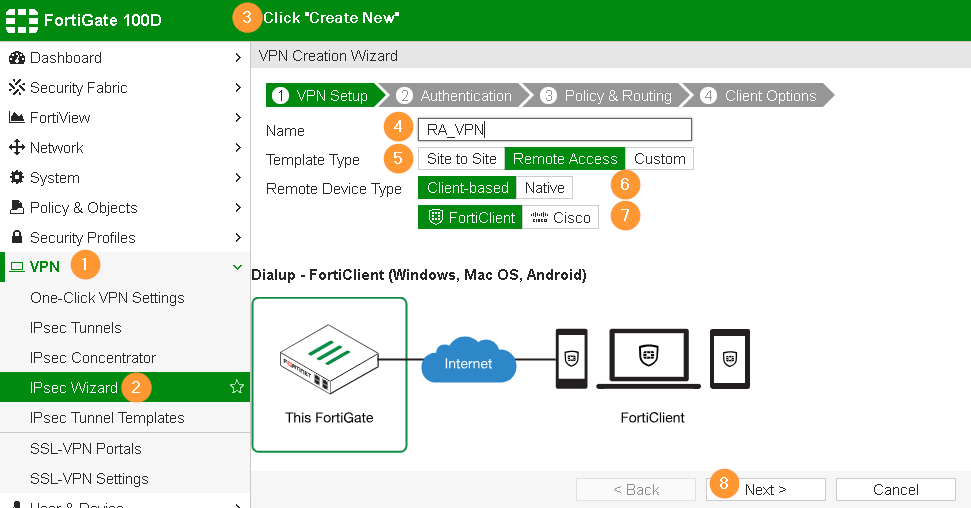
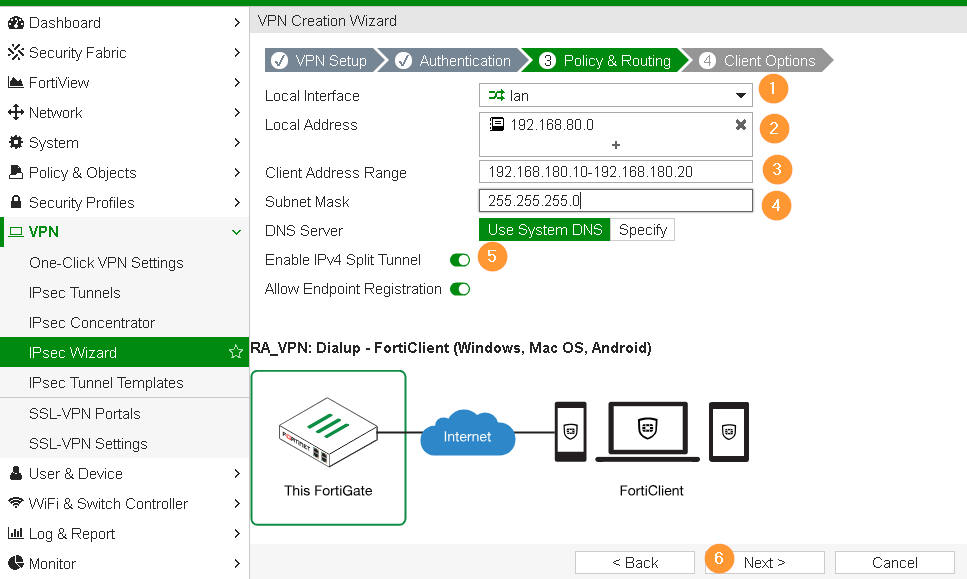
Step 3 – VPN Wizard
In the first wizard, choose Remote Access option and FortiClient connectivity.
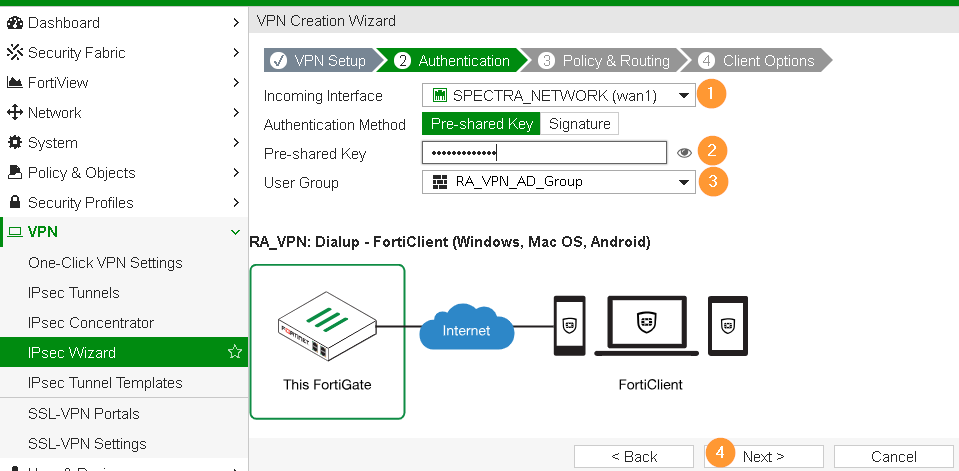
Specify Pre-shared key for firewall to authorize clients before prompting for additional credentials.
- LAN interface is the interface that your local systems are connected.
- Client Address Range: specify DHCP pool range for Forticlients, this should be in the same IP range as specified in Step 1.
- Split tunnel allows Forticlients to access your corporate systems and at the same, Internet can be accessed over their home, hotel or wherever they are located.
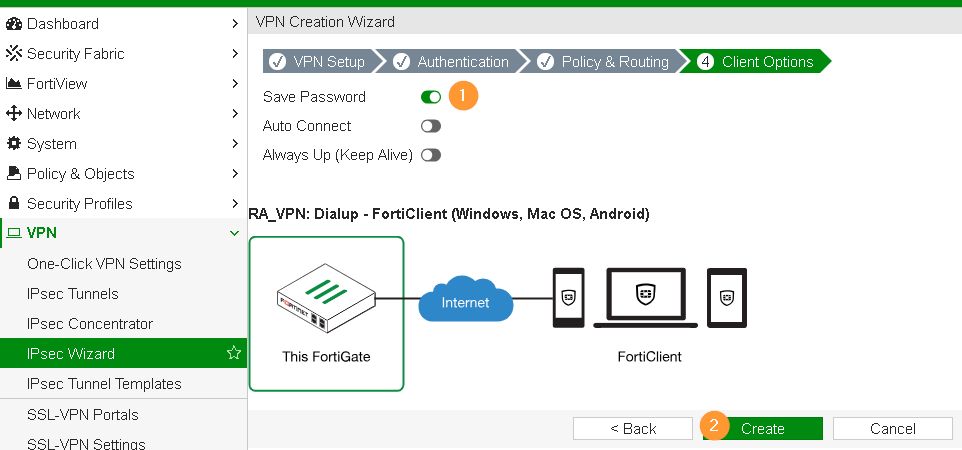
- Save Password: Allows the user to save the VPN connection password in the console.
- Auto Connect: When FortiClient is launched, the VPN connection will automatically connect.
- Always Up (Keep Alive): When selected, the VPN connection is always up even when no data is being processed. If the connection fails, keep alive packets sent to the FortiGate will sense when the VPN connection is available and re-connect.
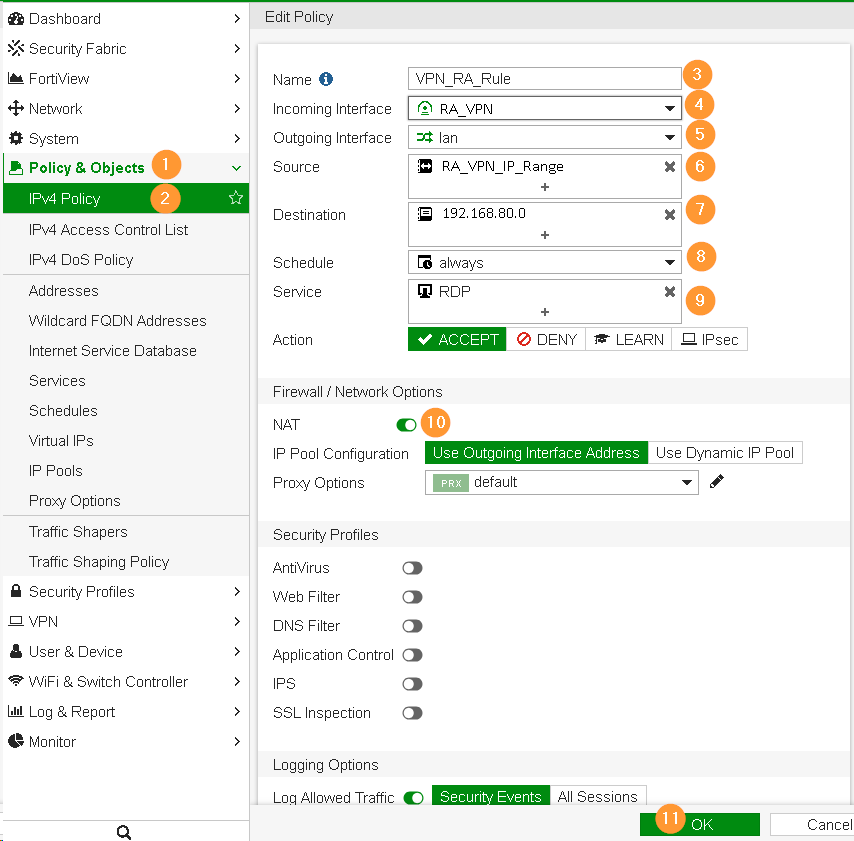
Step 4 – Create Firewall IPv4 Policy
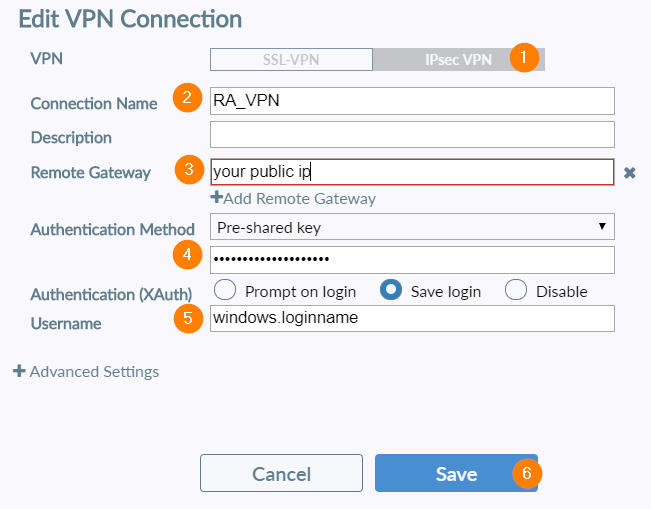
Final Step – Download and configure Forticlient
- Download Forticlient here and establish IPSec VPN connection to your corporate network.
+ إنشاء موضوع جديد
النتائج 1 إلى 1 من 1
-
02-09-2019, 03:56 #1Status
- Offline

- تاريخ التسجيل
- Apr 2014
- الدولة
- Egypt
- المشاركات
- 4,701
 Engineering and Technology
- معدل تقييم المستوى
- 10
 فايروول فورتي جيت FortiGate Firewall في بي ان IPsec VPN with FortiClient
------------------------------------------------------------------------
فايروول فورتي جيت FortiGate Firewall في بي ان IPsec VPN with FortiClient
------------------------------------------------------------------------
شركة رايز للهندسة و التكنولوجيا Rise Company for Engineering & Technology
------------------------------------------------------------------------
Web Hosting | Web Designing | E-Marketing
رقم # 1 فى خدمات الشركات Business Services
استضافة مواقع Web Hosting - عمل ايميل شركة Business Emails
تصميم موقع شركة Web Design - تسويق الكترونى على جوجل Google Adwords
www.rise.company | www.rise.company/emails
ملحوظة : جميع خدماتنا مخصصة للشركات فقط وغير متاحة للافراد
وليس لنا اى منتجات او صيانة نهائيا! يرجى الانتباه الى ذلك.

 رد مع اقتباس
المواضيع المتشابهه
-
فايروول فورتي جيت FortiGate Firewall الفى بى ان Site-to-Site IPsec VPN
بواسطة Rise Company في المنتدى قسم فايروول Fortigateمشاركات: 0آخر مشاركة: 02-08-2019, 14:00 -
فايروول فورتي جيت FortiGate Firewall برنامج فورتى كلاينت FortiClient
بواسطة Rise Company في المنتدى قسم فايروول Fortigateمشاركات: 0آخر مشاركة: 28-07-2019, 03:19 -
فايروول فورتي جيت FortiGate Firewall فورتى كلاينت IPsec VPN with FortiClient
بواسطة Rise Company في المنتدى قسم فايروول Fortigateمشاركات: 0آخر مشاركة: 28-07-2019, 02:46 -
فايروول فورتي جيت FortiGate Firewall شرح IPSec VPN - SSL VPN - UTM
بواسطة Rise Company في المنتدى قسم فايروول Fortigateمشاركات: 0آخر مشاركة: 26-05-2019, 02:37 -
كورس فايروول فورتي جيت FortiGate Firewall حلقة 7 عن Fortigate Home Lab Design
بواسطة Rise Company في المنتدى قسم فايروول Fortigateمشاركات: 0آخر مشاركة: 26-05-2019, 02:25

المفضلات