

ووردبريس WordPress ووكومرس WooCommerce سترايب stripe hooks events
woocommerce stripe hooks events - Webhook End Point Events to Send
Webhooks
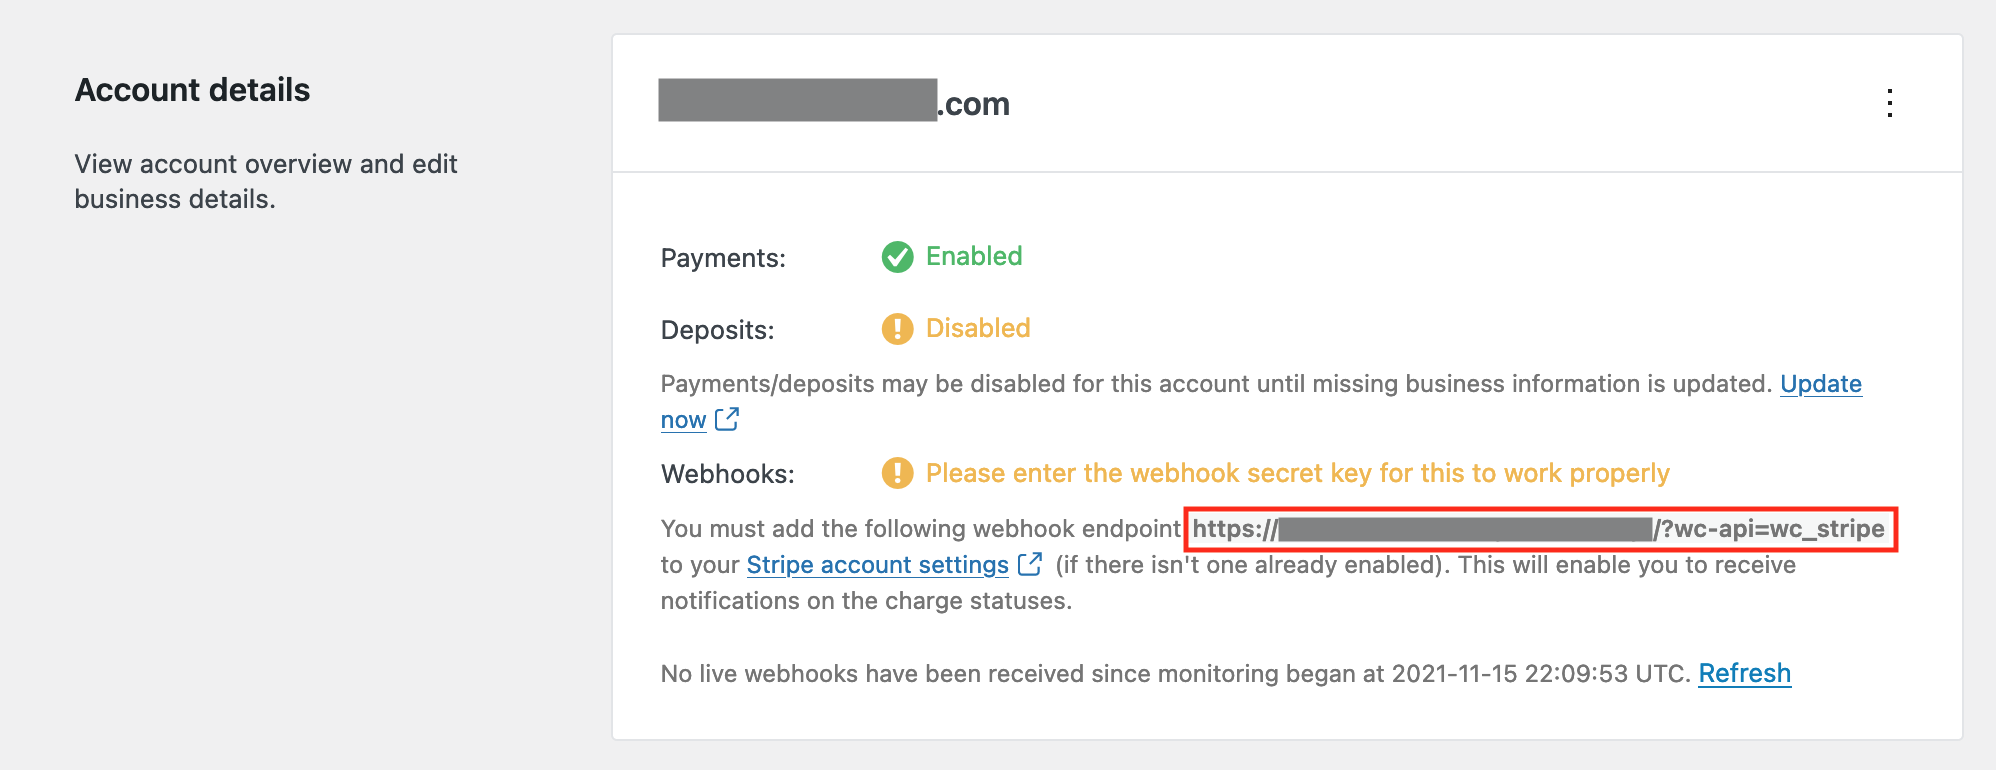
Webhooks are used by Stripe to communicate with your site. It provides information such as the status of the payment, and is used to update the order based on certain events from Stripe’s side of things.
In the settings, you’ll find a webhook endpoint URL ready for you to copy and paste into your Stripe dashboard:
- Head to WooCommerce » Settings » Payments » Stripe. Under the Settings » Account details section, copy your webhook endpoint URL into your clipboard.
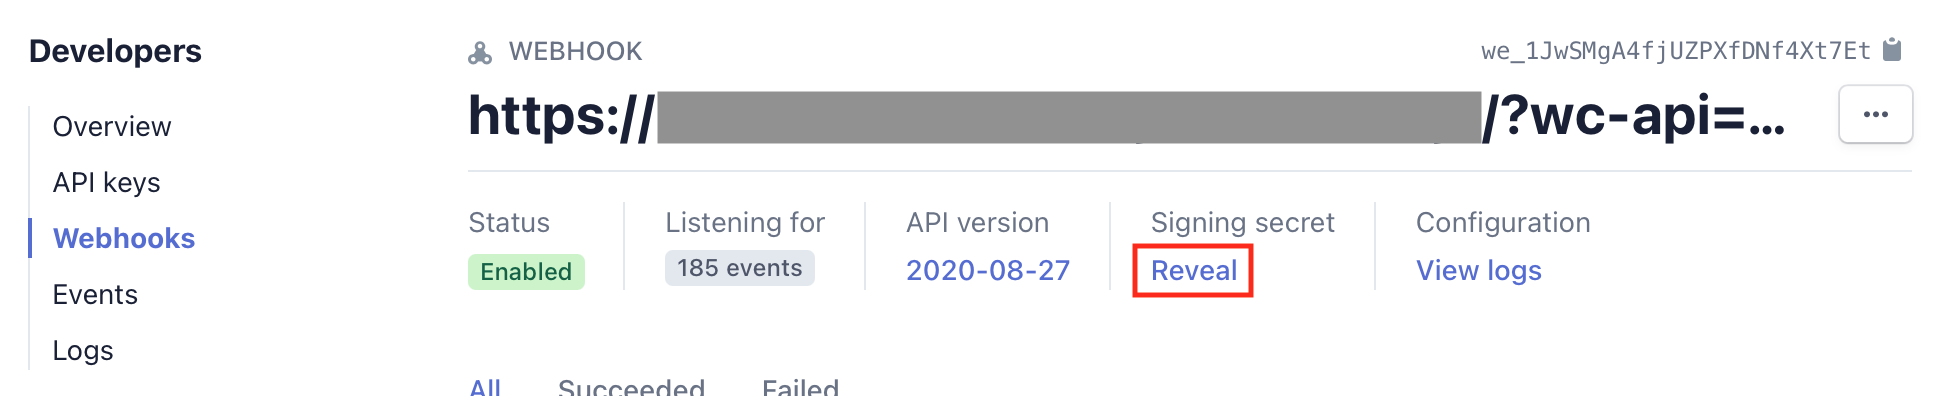
- Next, in your Stripe Dashboard go to Developers » Webhooks and select Add endpoint
- (with “Test mode” enabled or disabled, depending on which mode is being configured).
- Paste the webhook endpoint URL you copied earlier into the Endpoint URL field, and select the following events (at minimum):
- source.chargeable
- source.canceled
- charge.succeeded
- charge.failed
- charge.captured
- charge.dispute.created
- charge.dispute.closed
- charge.refunded
- review.opened
- review.closed
- payment_intent.succeeded
- payment_intent.payment_failed
- payment_intent.amount_capturable_updated
- setup_intent.succeeded
- setup_intent.setup_failed
- Select Latest API version from the Version section, if shown, and then “Add endpoint”.
- Copy the Signing secret (after clicking Reveal).
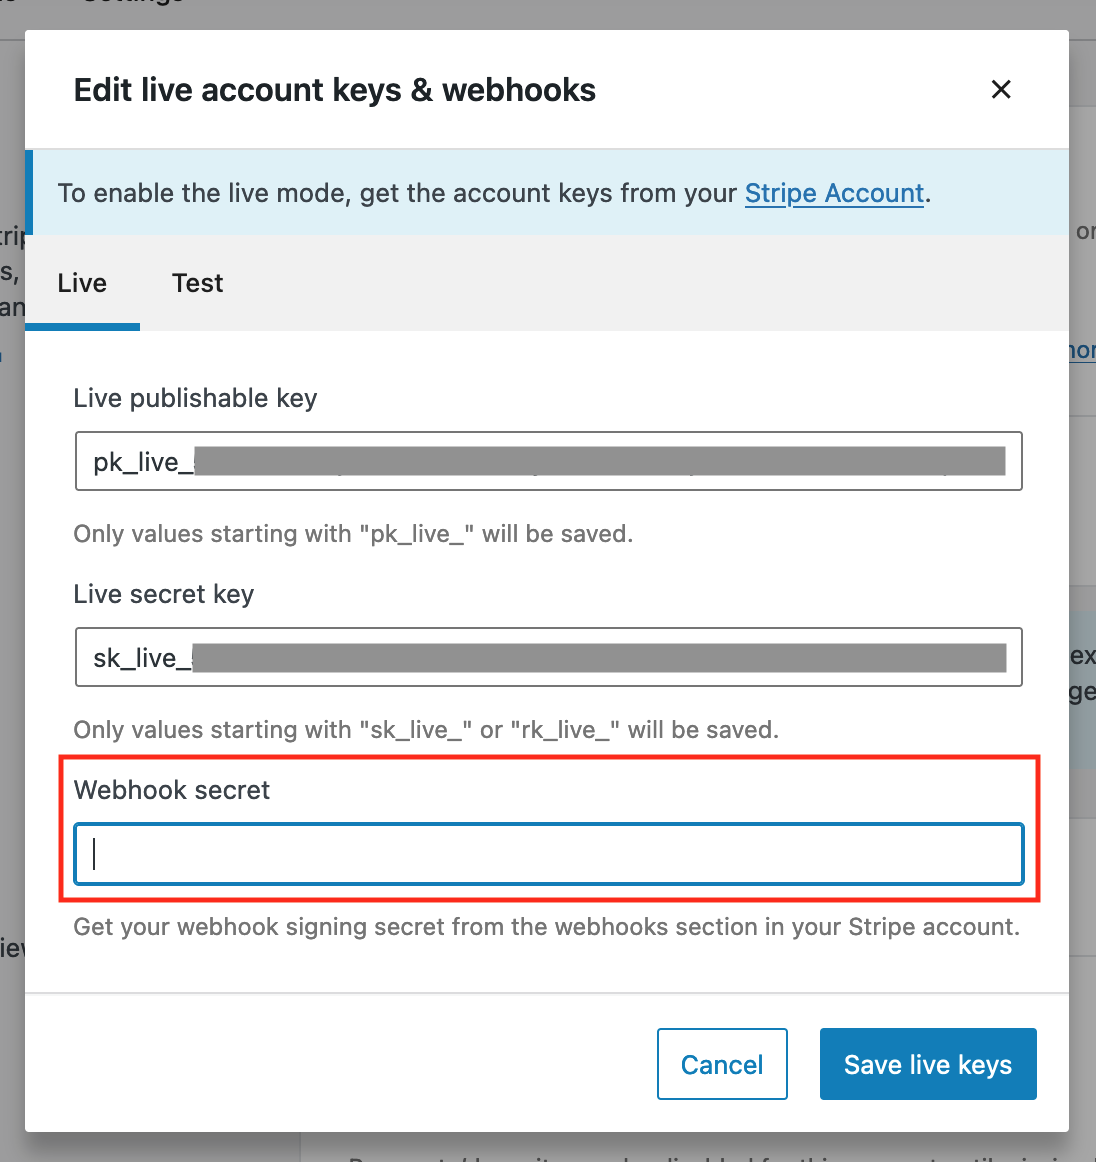
- Back in WooCommerce » Settings » Payments » Stripe, click Edit account keys (above the “Account details”), paste the secret into the Webhook secret field, and save the keys.
- If this was done in test mode, repeat the process after switching Enable test mode off (or vice versa, if necessary).
المرجع:
https://wordpress.org/support/topic/...vents-to-send/
https://woocommerce.com/document/stripe/#section-3
+ إنشاء موضوع جديد
النتائج 1 إلى 1 من 1
-
01-01-2022, 08:18 #1Status
- Offline

- تاريخ التسجيل
- Apr 2014
- الدولة
- Egypt
- المشاركات
- 4,619
 Engineering and Technology
- معدل تقييم المستوى
- 10
 ووردبريس WordPress ووكومرس WooCommerce سترايب stripe hooks events
------------------------------------------------------------------------
ووردبريس WordPress ووكومرس WooCommerce سترايب stripe hooks events
------------------------------------------------------------------------
شركة رايز للهندسة و التكنولوجيا Rise Company for Engineering & Technology
------------------------------------------------------------------------
Web Hosting | Web Designing | E-Marketing
رقم # 1 فى خدمات الشركات Business Services
استضافة مواقع Web Hosting - عمل ايميل شركة Business Emails
تصميم موقع شركة Web Design - تسويق الكترونى على جوجل Google Adwords
www.rise.company | www.rise.company/emails
ملحوظة : جميع خدماتنا مخصصة للشركات فقط وغير متاحة للافراد
وليس لنا اى منتجات او صيانة نهائيا! يرجى الانتباه الى ذلك.


 رد مع اقتباس
المواضيع المتشابهه
-
ووردبريس WordPress ووكومرس WooCommerce حل مشكلة وجود category مخفى
بواسطة Rise Company في المنتدى قسم ووردبريس WordPressمشاركات: 0آخر مشاركة: 14-06-2021, 00:39 -
ووردبريس WordPress ووكومرس WooCommerce ترجمة كلمة Proceed و Update cart
بواسطة Rise Company في المنتدى قسم ووردبريس WordPressمشاركات: 0آخر مشاركة: 06-05-2021, 07:20 -
ووردبريس WordPress ووكومرس WooCommerce مشكلة Add To Cart لا يعمل
بواسطة Rise Company في المنتدى قسم ووردبريس WordPressمشاركات: 0آخر مشاركة: 04-05-2021, 05:23 -
ووردبريس WordPress ووكومرس WooCommerce ازالة الكمية Quantity Field
بواسطة Rise Company في المنتدى قسم ووردبريس WordPressمشاركات: 0آخر مشاركة: 20-04-2021, 04:15 -
ووردبريس WordPress ووكومرس WooCommerce مشكلة تعديل المتجر Can’t Edit Shop Page
بواسطة Rise Company في المنتدى قسم ووردبريس WordPressمشاركات: 0آخر مشاركة: 22-03-2021, 11:55

المفضلات